Works in Russia without a VPN
Six steps: add CasusLegal One, sign in to the service, and select the connector before submitting a query.
The instructions show the Perplexity Computer interface. Enter the connector name in Latin characters and copy the entire address.
Sign in to your account at Perplexity. In the “Computer” section, open “Settings” → Connectors — the list of connections.

Click + Custom connector and select Add MCP connector.

In the Name enter CasusLegal One, in the MCP server URL — address:
https://mcp.casus.legal/one/mcp
Section “Advanced” leave unchanged. Read the warning about custom connectors, tick the confirmation checkbox, and click “Add”.

On the card for the connector you created, click “Add connector”, if Perplexity offers this button, and complete sign-in in the window that opens.
Click Sign in via Telegram or enter the connector access password set in the “Security” section of your personal account. You can check database access in the CasusLegal personal account.

Wait to be returned to Perplexity. Do not close the authorization window until sign-in is complete.
Open the card CasusLegal One: after successful authorization, the connector should have the status Connected (“Connected”). The mere appearance of the card in the list is not sufficient—the sign-in process must be completed.
Important: connecting it in the settings is not enough. For Perplexity to use the database in a query, select the connector through the menu «+» next to the input field.
Open “+” → “Connectors” and tick CasusLegal One. Check that a check mark appears next to it and that its name appears above the query field. If you entered a different name when adding it, select that name.
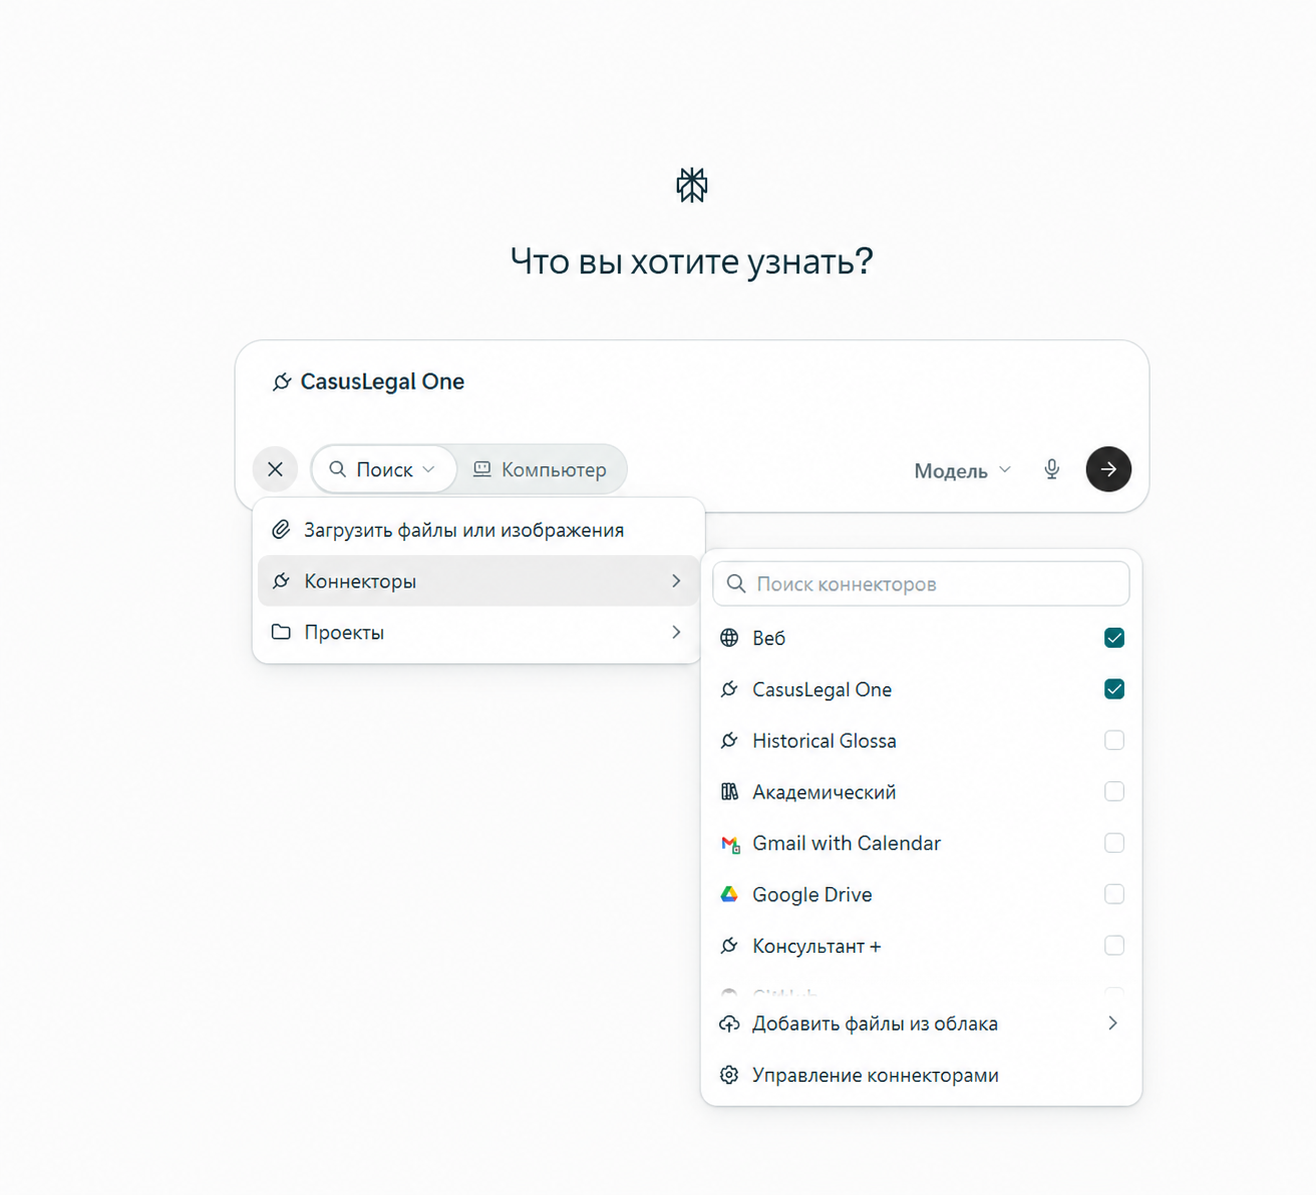
The menu is already open in the screenshot, so a cross appears instead of “+”. After selecting it, close the menu and submit the question. In a new dialogue, check that the required connector is selected.
Ask it to find material in the connector’s database and check that the response contains the sources found and links to them.
If the card still offers “Add connector”, repeat the sign-in process and wait for the return from the authorization window. If registration fails, check the URL and try adding the connector again. Do not enter the password in the URL field.