Connecting connectors
One set of instructions for all connectors and all environments. First select a connector, then your environment: the name, address and sign-in window shown in the screenshots will change according to your selection.
Step 1 · Which connector are you connecting?
- Connector name
- Address (URL)
- Sign in
- Contents
Step 2 · Your environment
Claude
The claude.ai website and desktop application use the same procedure. It is not yet possible to add a connector from the mobile application.
Open connector settings
In Claude’s left-hand panel, click Customize (“Customize”), then go to Connectors.
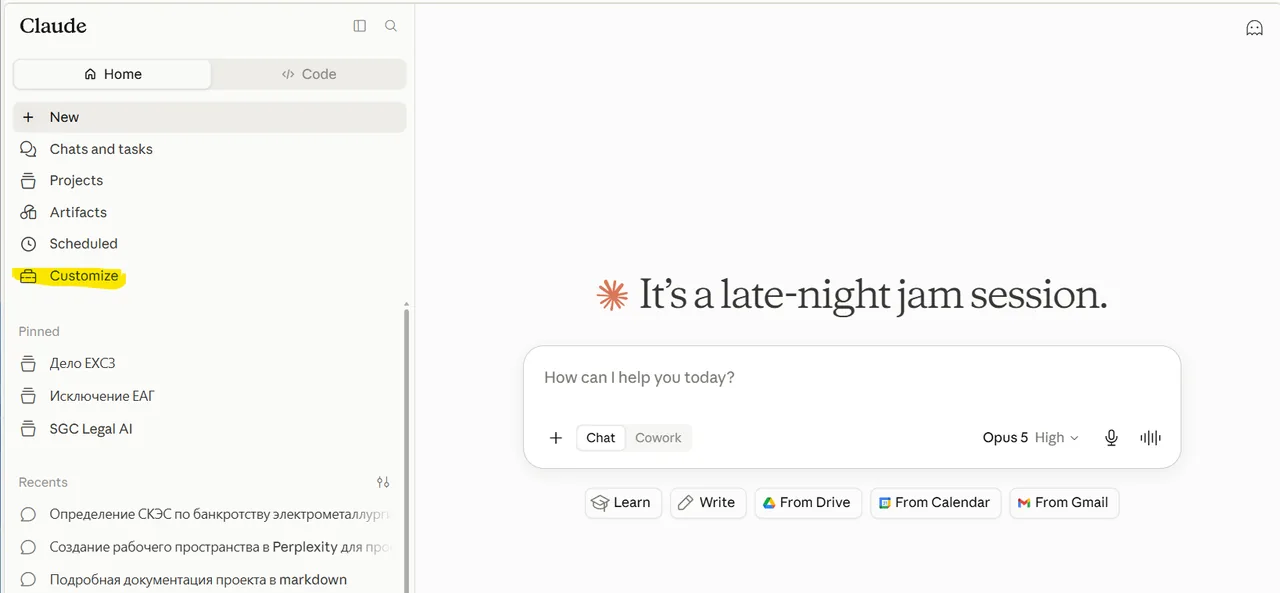
Customize is highlighted in yellow. Click Add → Add custom connector
The button Add is in the upper-right corner; it opens the connector-addition menu. The ready-made cards (Slack, Microsoft 365) are not needed.
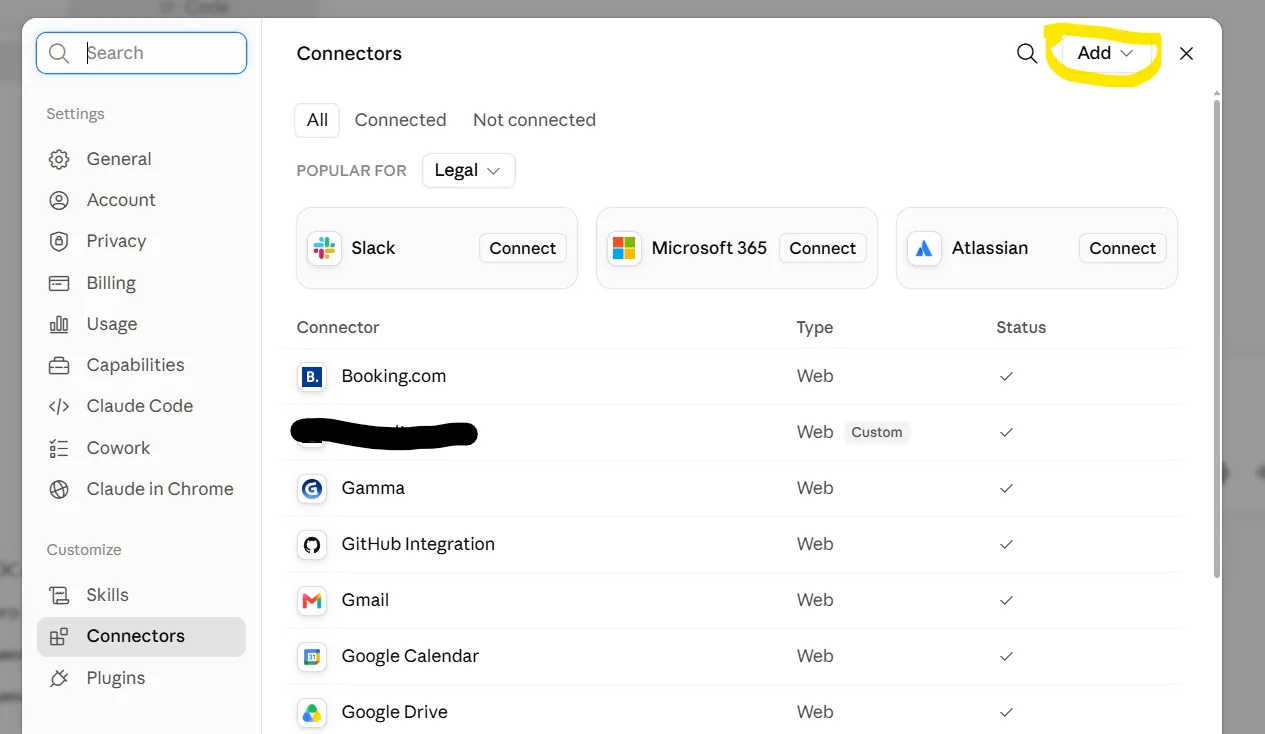
The Add button is outlined in yellow. Enter the name and address
Enter the name in Latin characters; we suggest . In the field Remote MCP server URL enter the address .
Leave the fields in the Advanced settings section blank: the OAuth Client ID and Client Secret fields are intended for technical client parameters, not your password or code. Click Add.
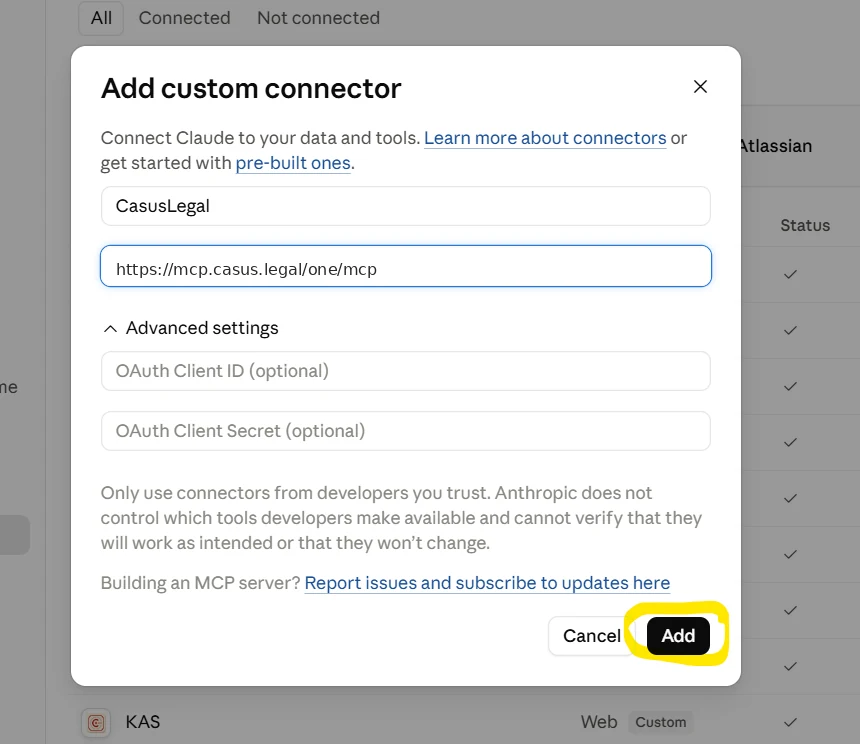
The name and address in the screenshot correspond to the selected connector. Click Connect
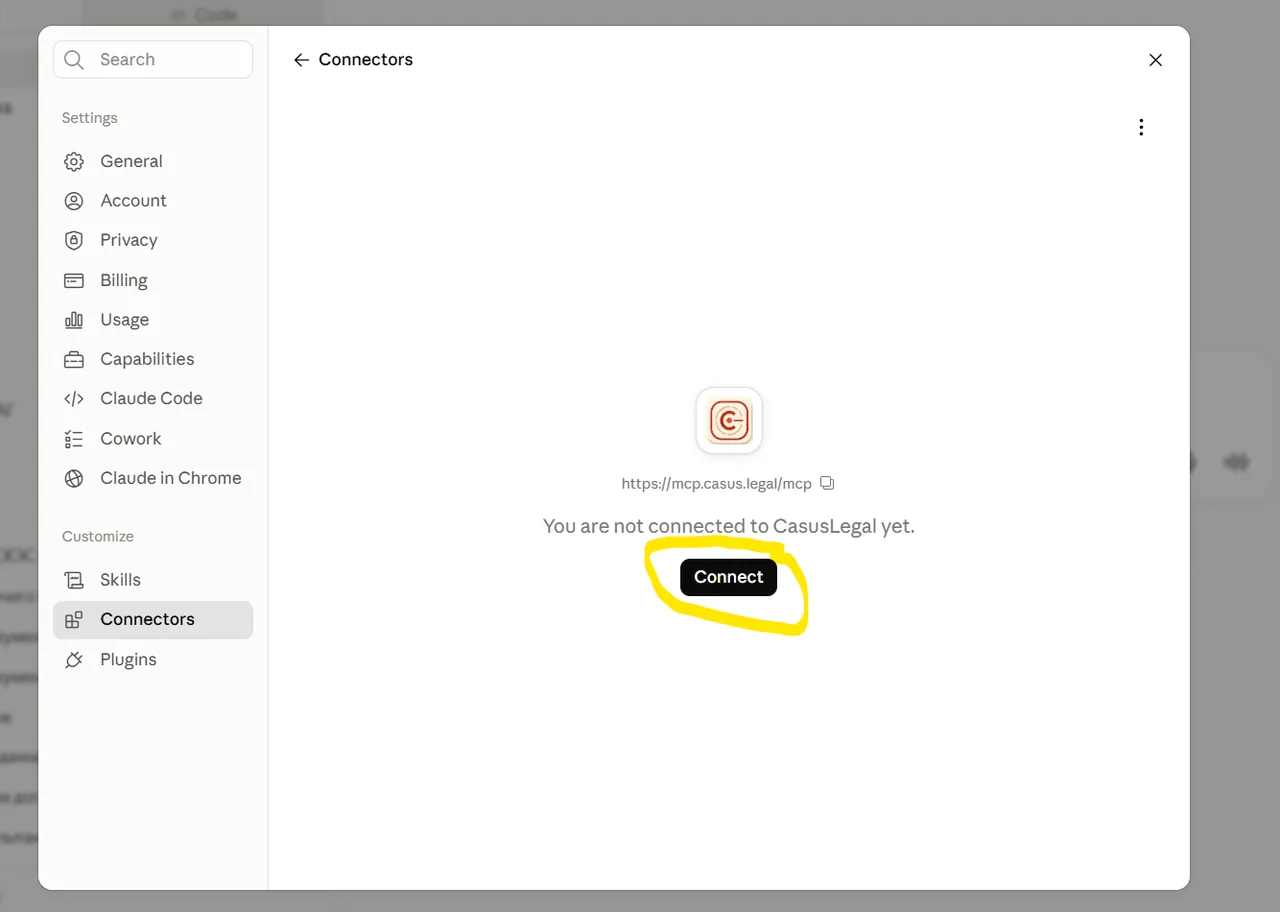
The address is visible below the icon: check it to ensure that the intended connector is being connected. Choose permissions for the tools
Open the connector card and settings Tool permissions. There are Read-only tools three options available:
- Always allow: allow requests without separate approval.
- Needs approval: ask for your consent before each request.
- Blocked: prohibit requests.
This setting controls whether a call is permitted, not how often it occurs: Always allow does not mean that the connector will be called in every response.
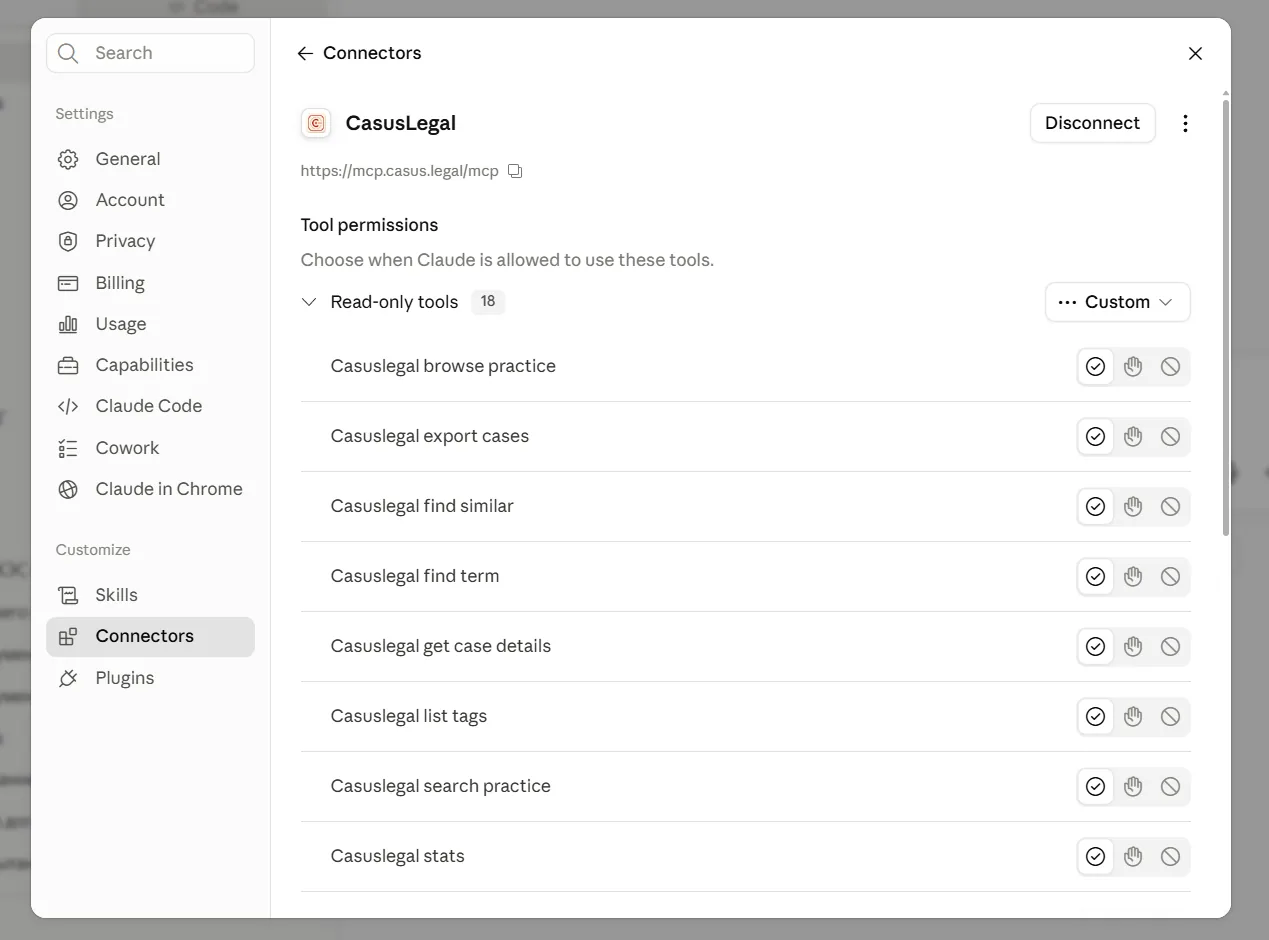
Tool permissions section: mode switch to the right of Read-only tools. Enable the connector in the required chat
Click + next to the input field → Connectors and enable . If it is not needed in this conversation, disable it in the same place.
Check. Open a new chat and ask: «» The response should contain case details and links to the source.

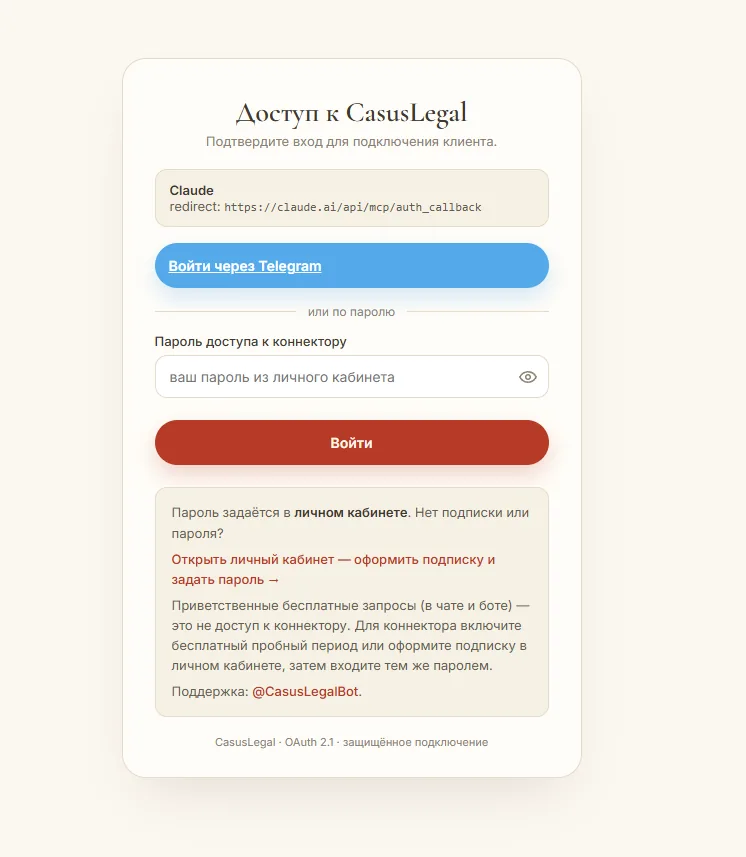
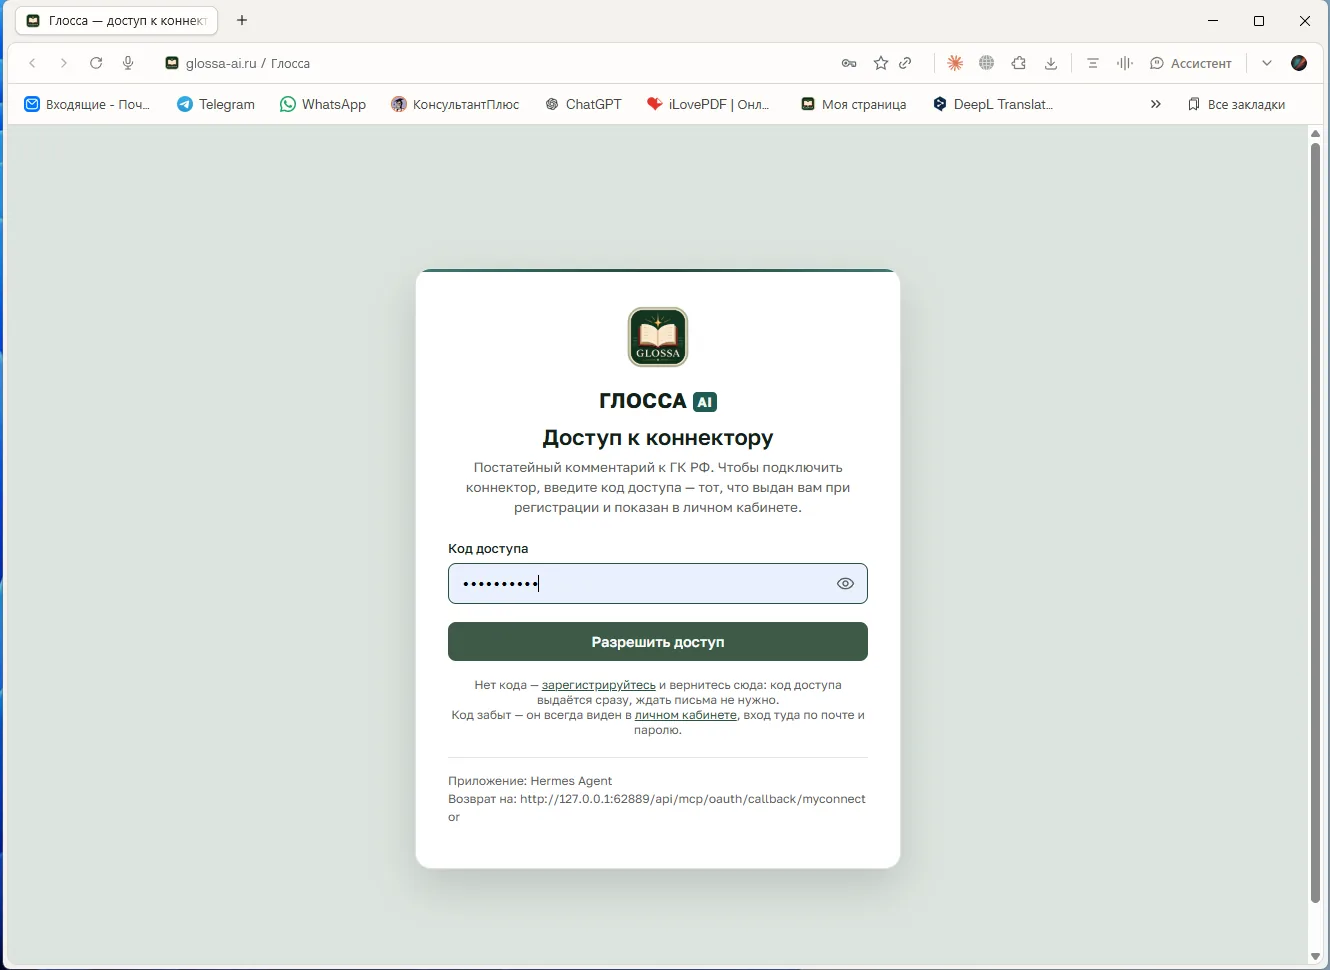
ChatGPT
Two methods are available: ask the ChatGPT agent to connect everything itself or complete the form manually. Configure it on a computer in a browser.
Method 1. Ask Work or Codex
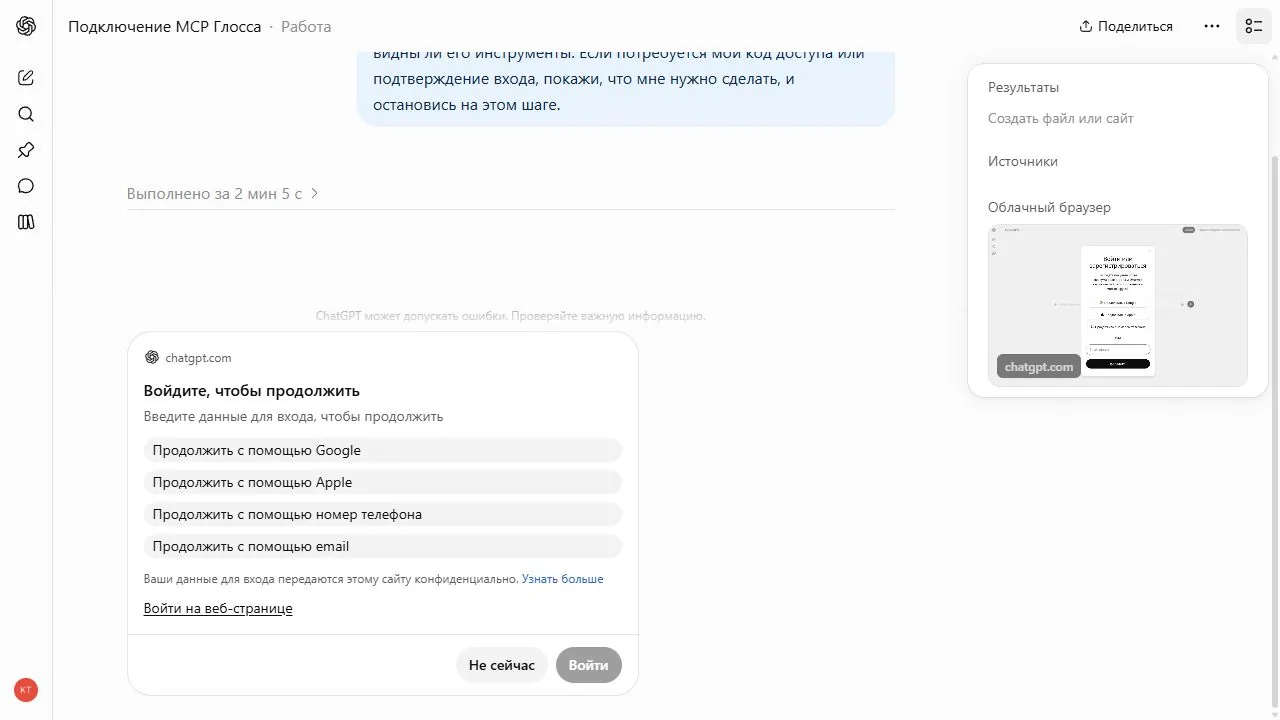
Copy the request into a new ChatGPT chat in “Work” mode or into a Codex task. During testing, the agent began the setup and stopped at account sign-in; completion of the connection by this method has not yet been confirmed.
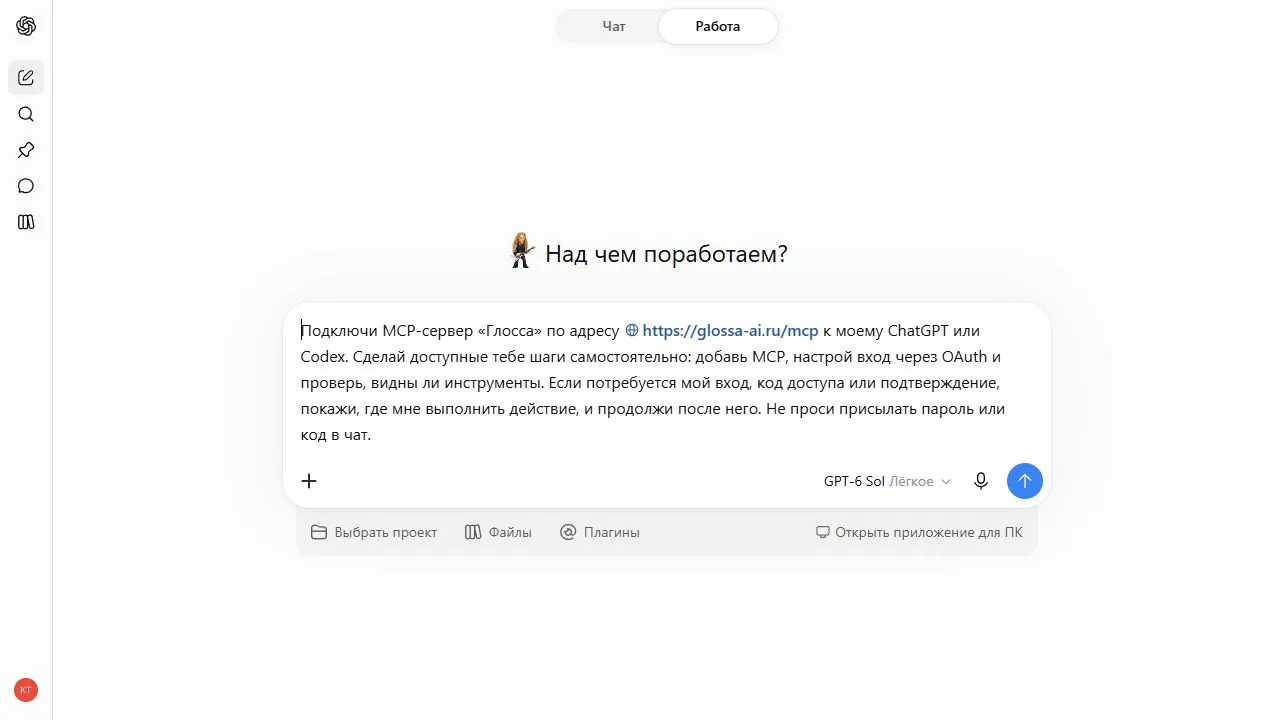
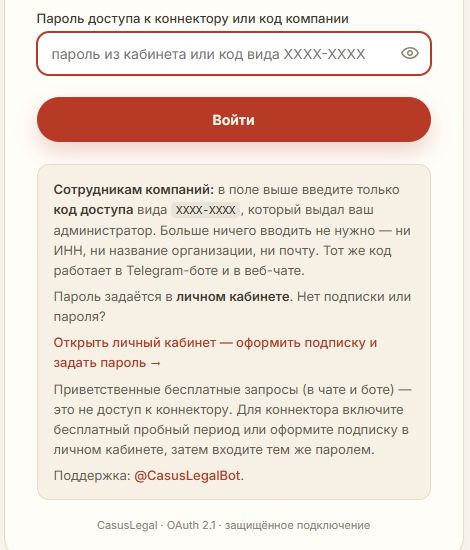
If sign-in is required, complete it in the ChatGPT window that opens. Enter the password or code only on the service’s sign-in page; do not send it in the chat.
Method 2. Connect manually by address
Open the “Plugins” section
In a browser, go to chatgpt.com/plugins and click “Add”. If creating your own MCP is unavailable, enable developer mode in the account settings.
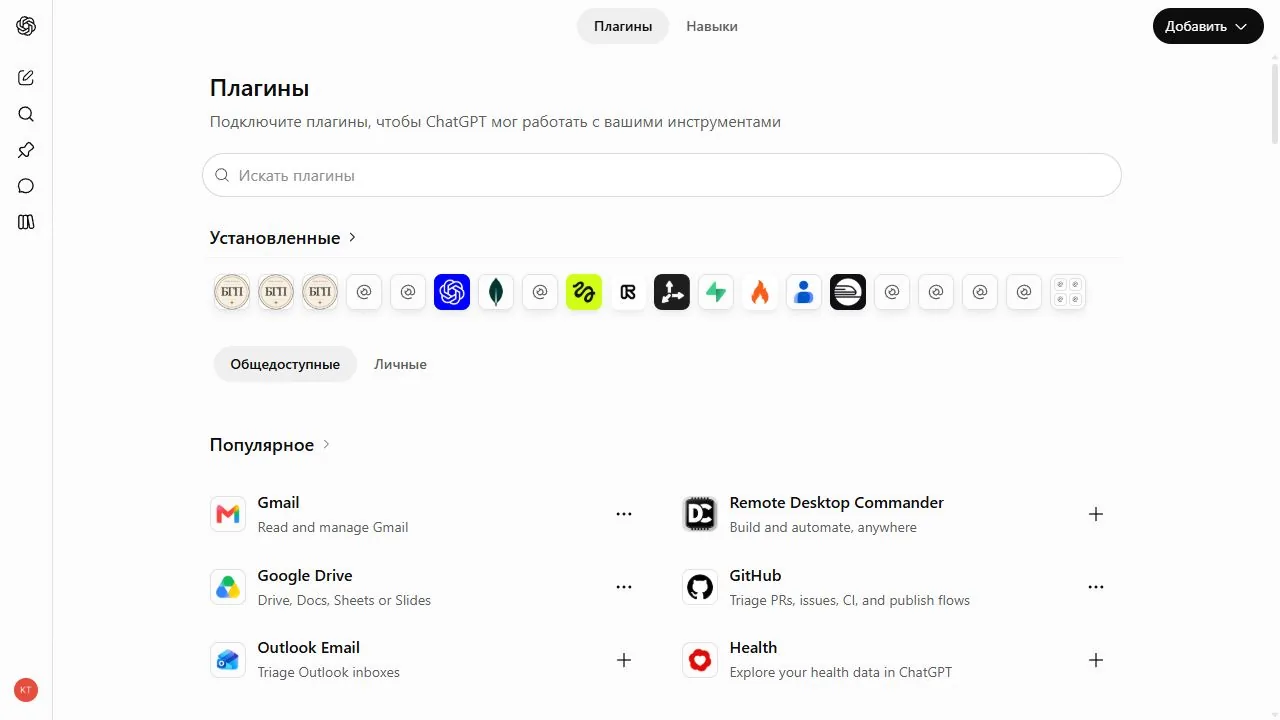
ChatGPT plugin directory and “Add” button. Select “Create MCP app”
The “Create plugin” option opens a different process and is not needed.
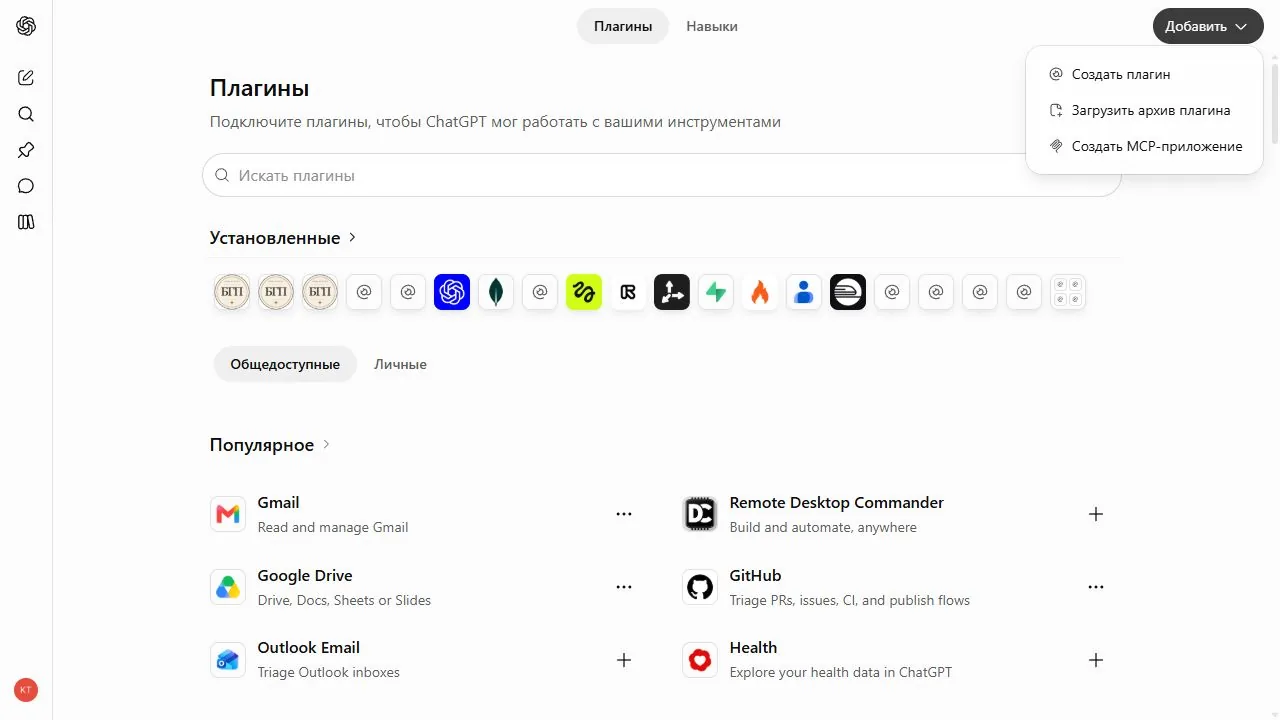
The “Create MCP app” option is selected in the menu. Enter the address and sign-in details
Name: . In the “Connection” section, leave “Server URL” and enter . In the “Authentication” section, select ; leave the advanced settings blank.
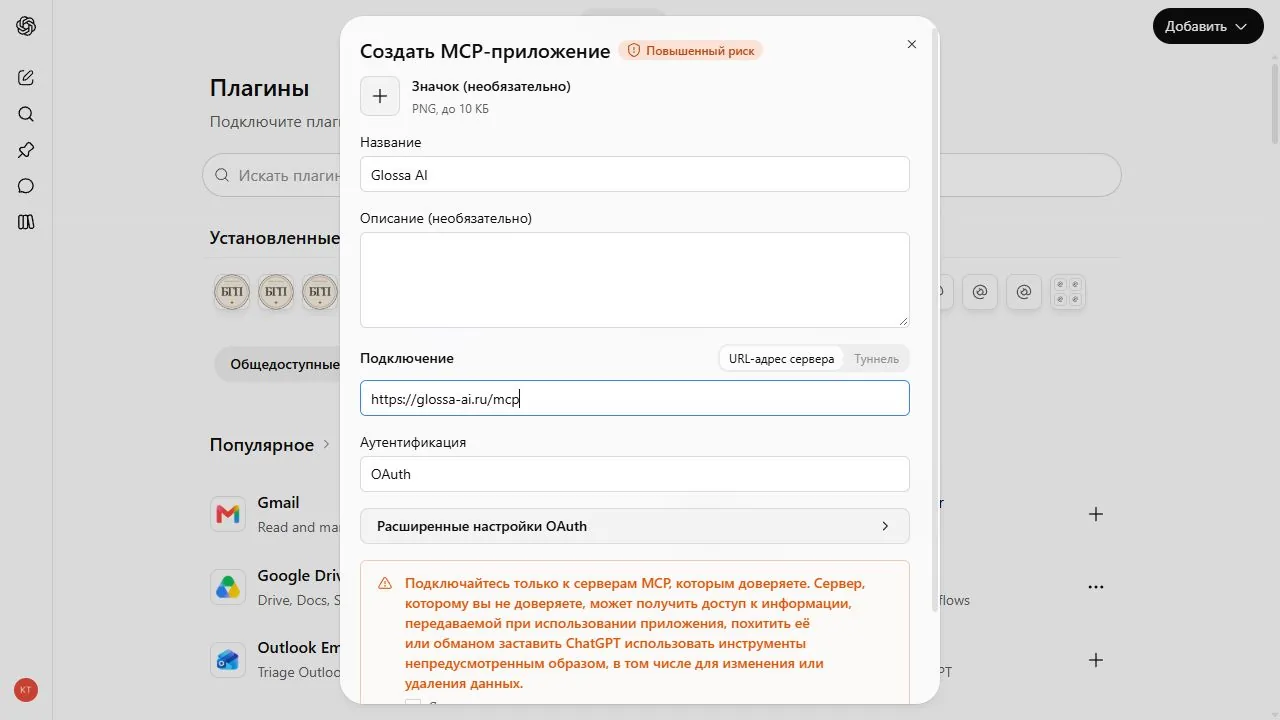
The name, address and sign-in method for the selected connector. Confirm creation
Read the warning about a third-party MCP server, select “I understand and want to continue” and click “Create”.
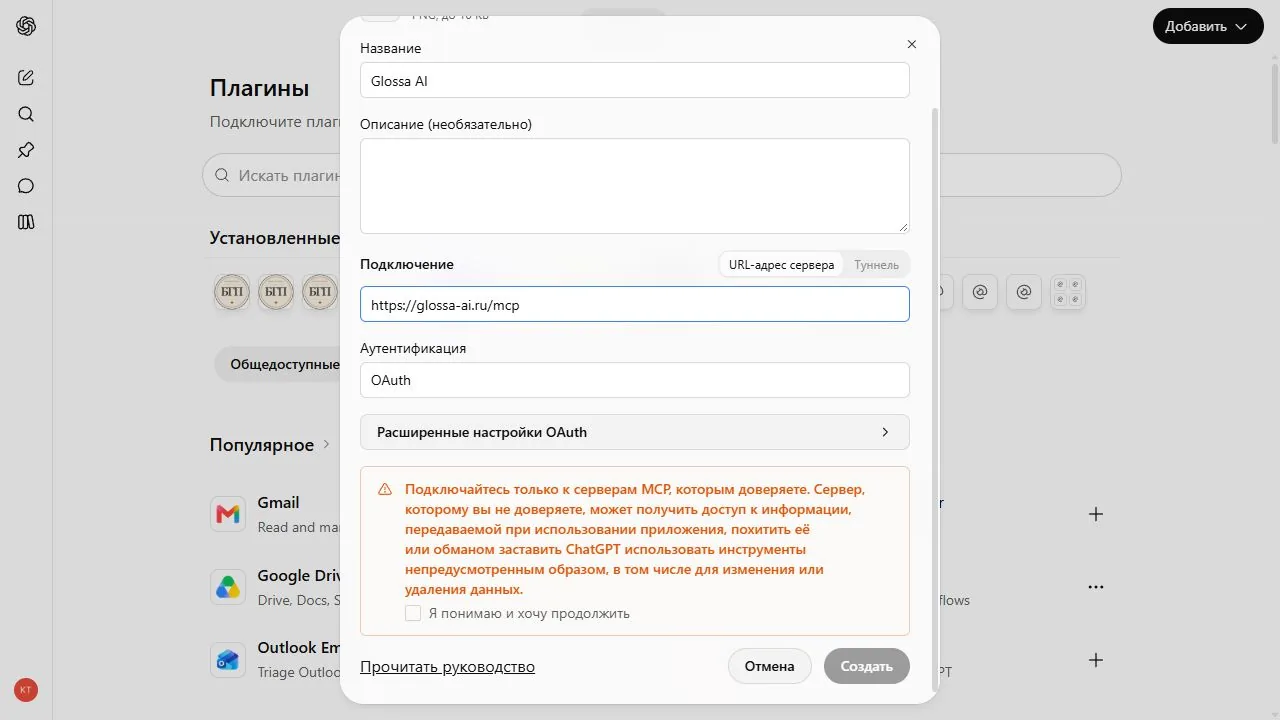
Warning, confirmation checkbox, and “Create” button. Select a connector in the chat
In a new conversation, click “+” next to the input field and select the app or type @ followed by its name. The selected app will appear above the field.
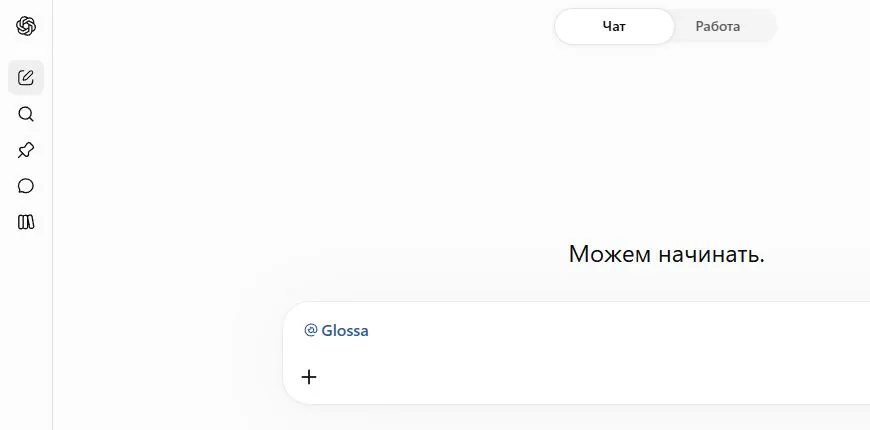
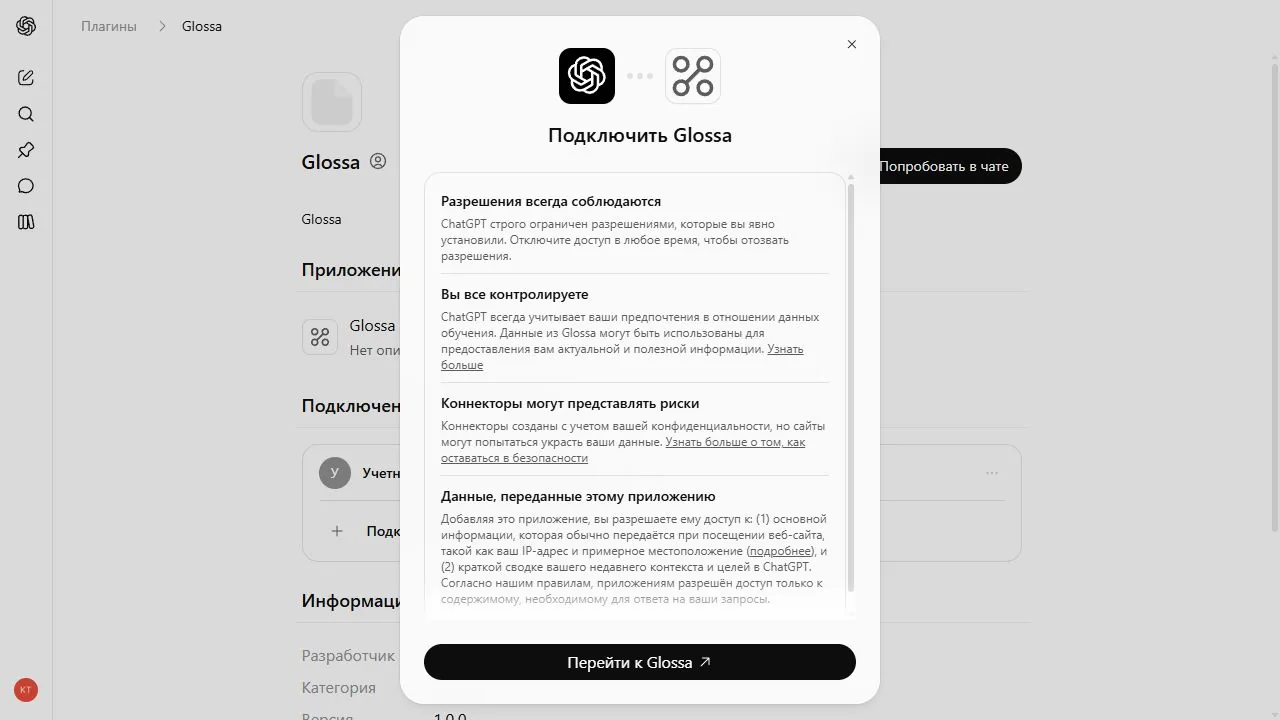
This is what the selected app looks like above the input field; in the screenshot it is “Glossa,” while yours will show the name of the selected connector. Check. Ask: “» The response should contain case details and links to the source.
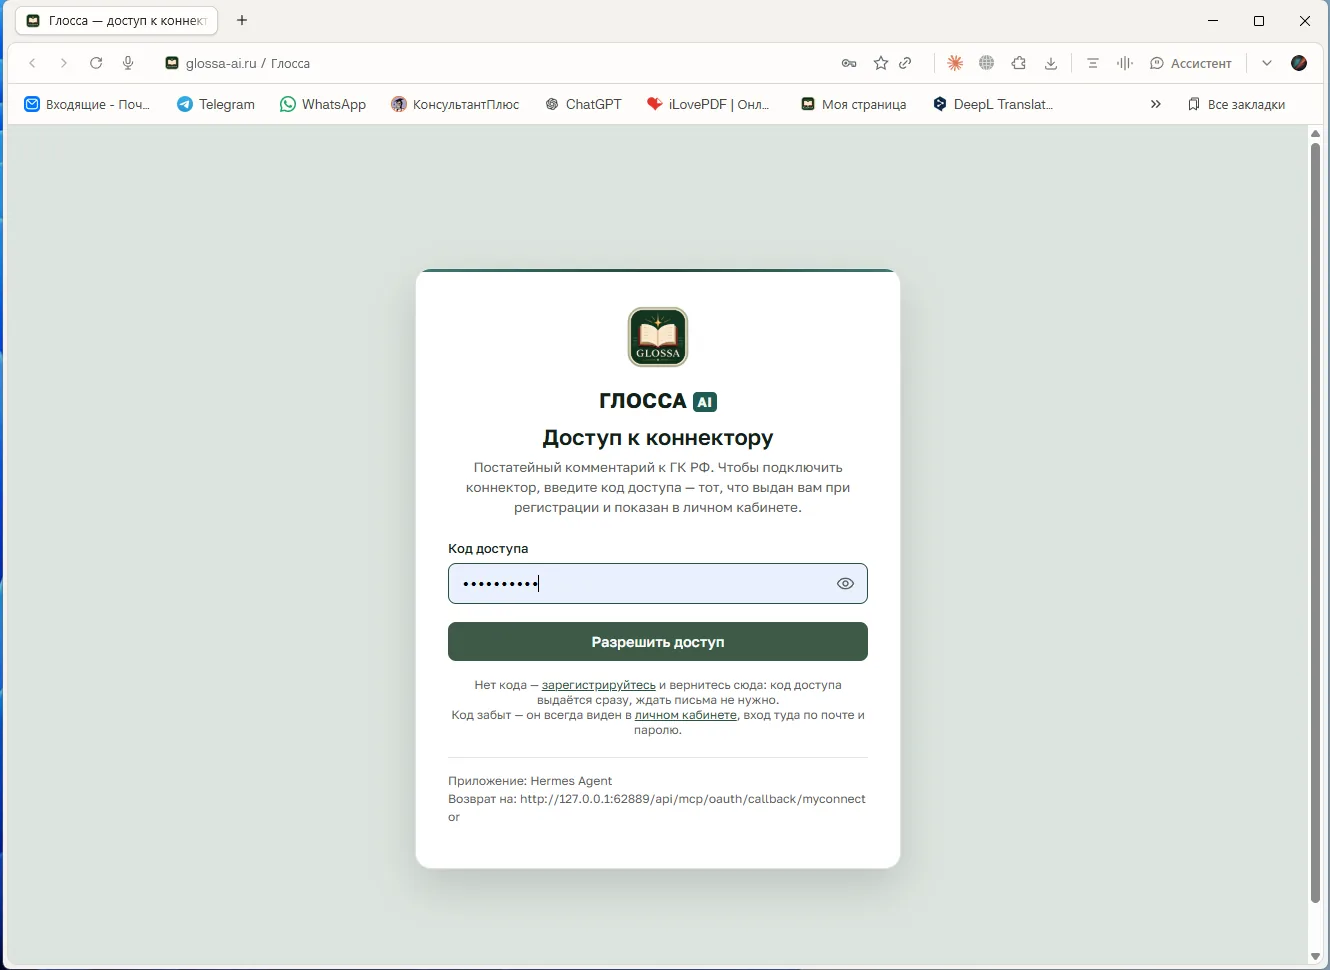
Grok
The grok.com website or desktop app. It is not yet possible to add a connector from the mobile app. Connectors are also available on Grok’s free plan.
Open “Skills and connectors”
In the left panel, click “Skills and Connectors” under “Automations.”
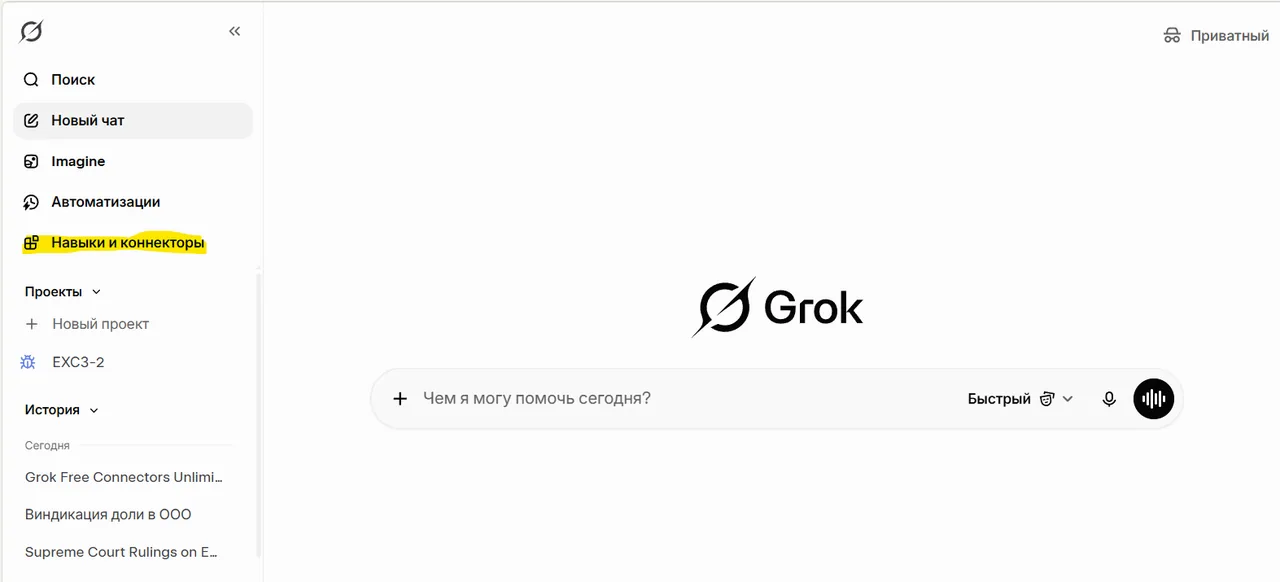
Click “New connector”
The “Connectors” tab and the button in the upper-right corner. The cards for Gmail, Google Drive, and other services are not needed here.
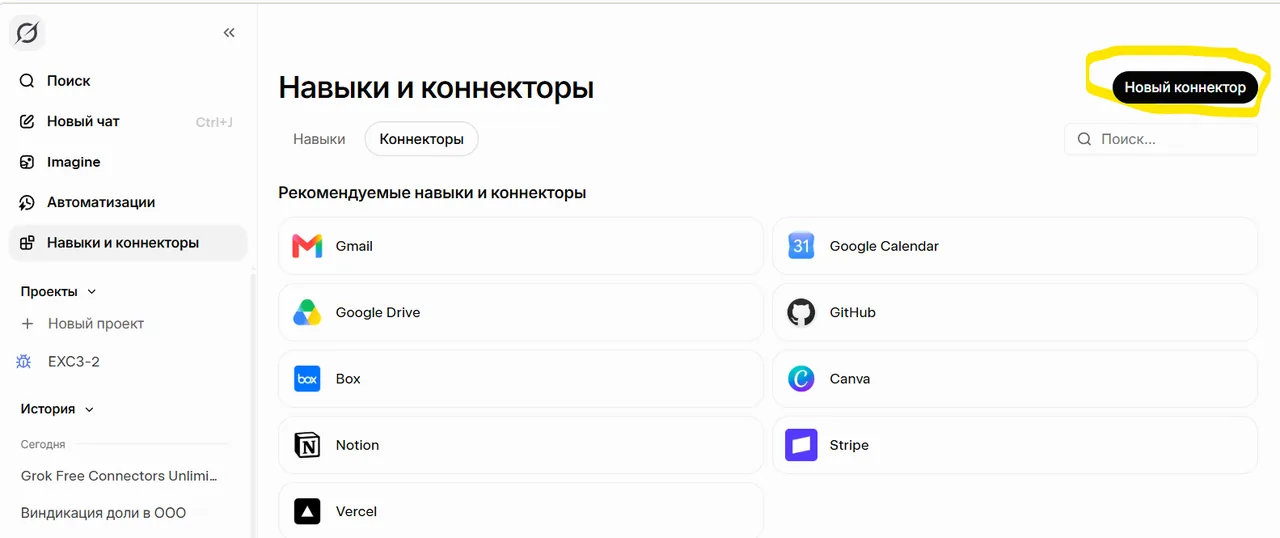
Select “Custom settings”
The first item labeled “Add your own custom connector.”
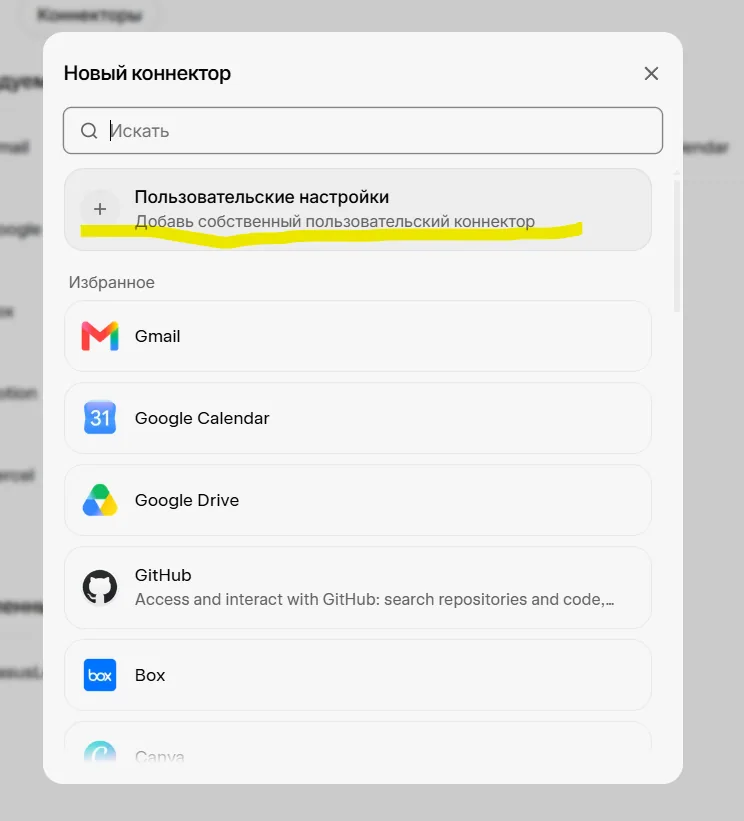
Fill in two fields
Name in Latin characters: . Server URL: . Click “Add Connector”; Grok determines the OAuth parameters itself.
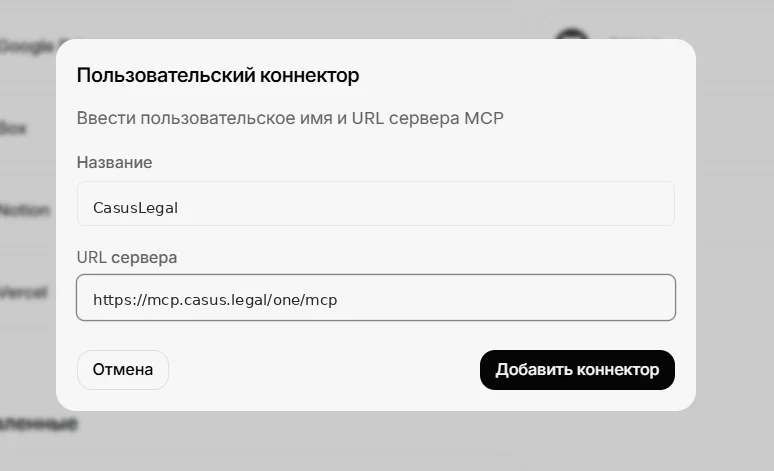
The name and address in the screenshot correspond to the selected connector. Enable the connector in the conversation
Unlike Claude, in Grok the connector is specified for the conversation: while typing your question, select it directly below the input line . The quick way: type
@and select the connector from the list. The selection remains active until the end of the conversation; you need to repeat it in a new chat.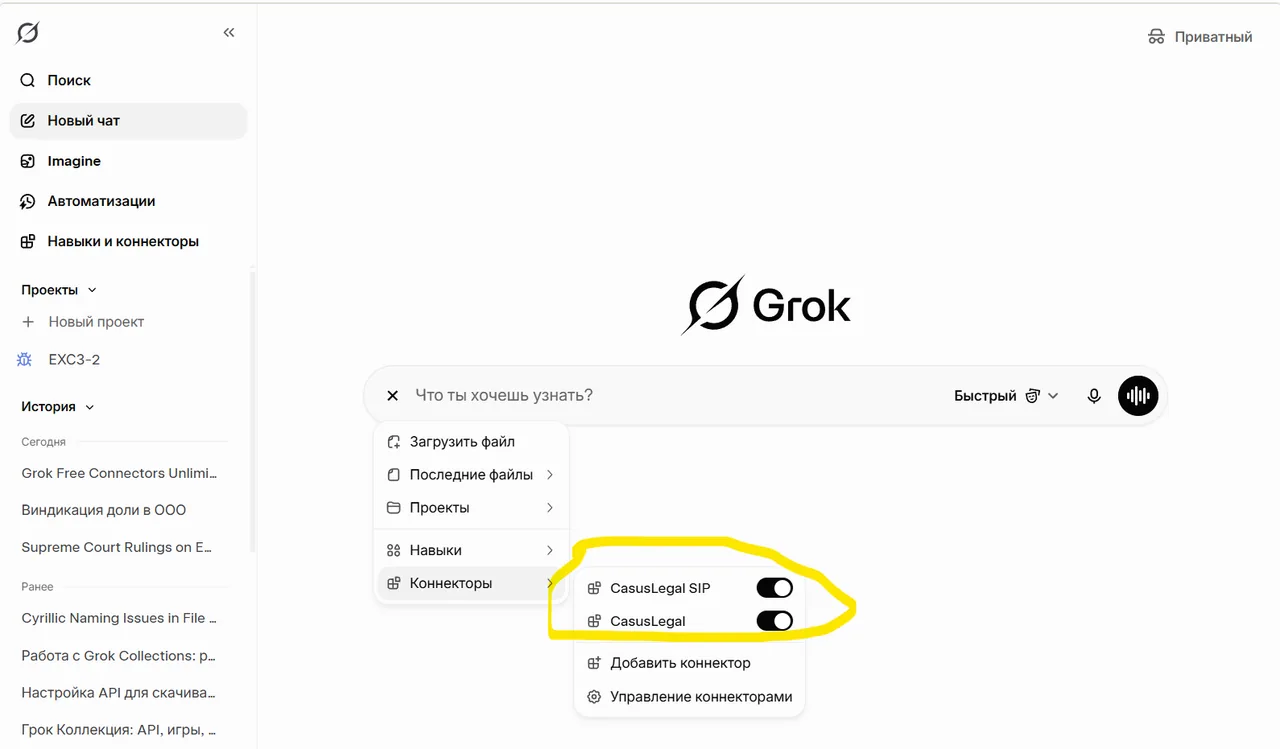
Check. With the connector selected, ask: “»
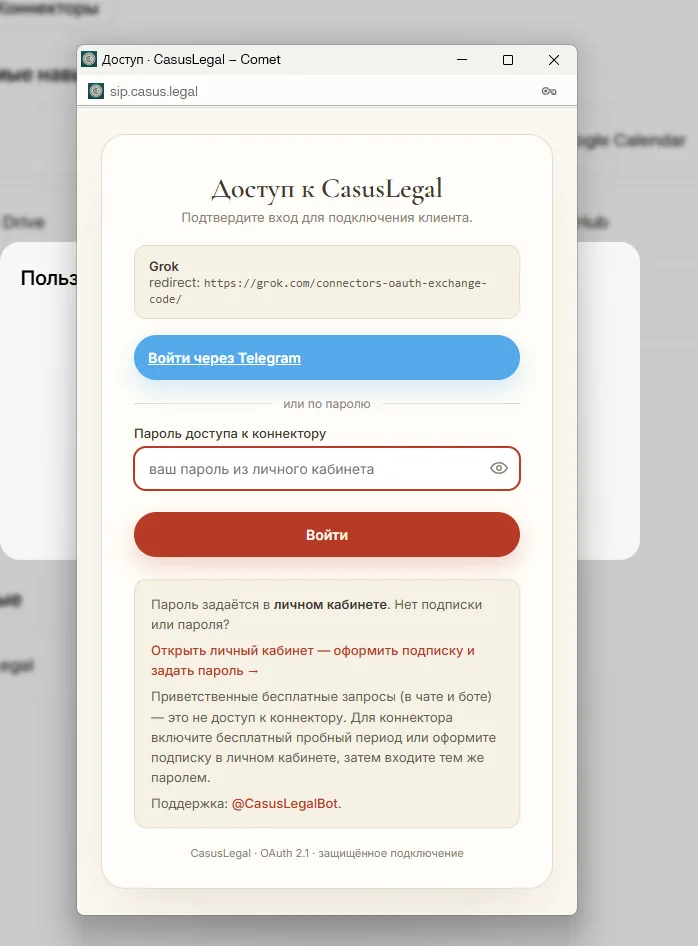
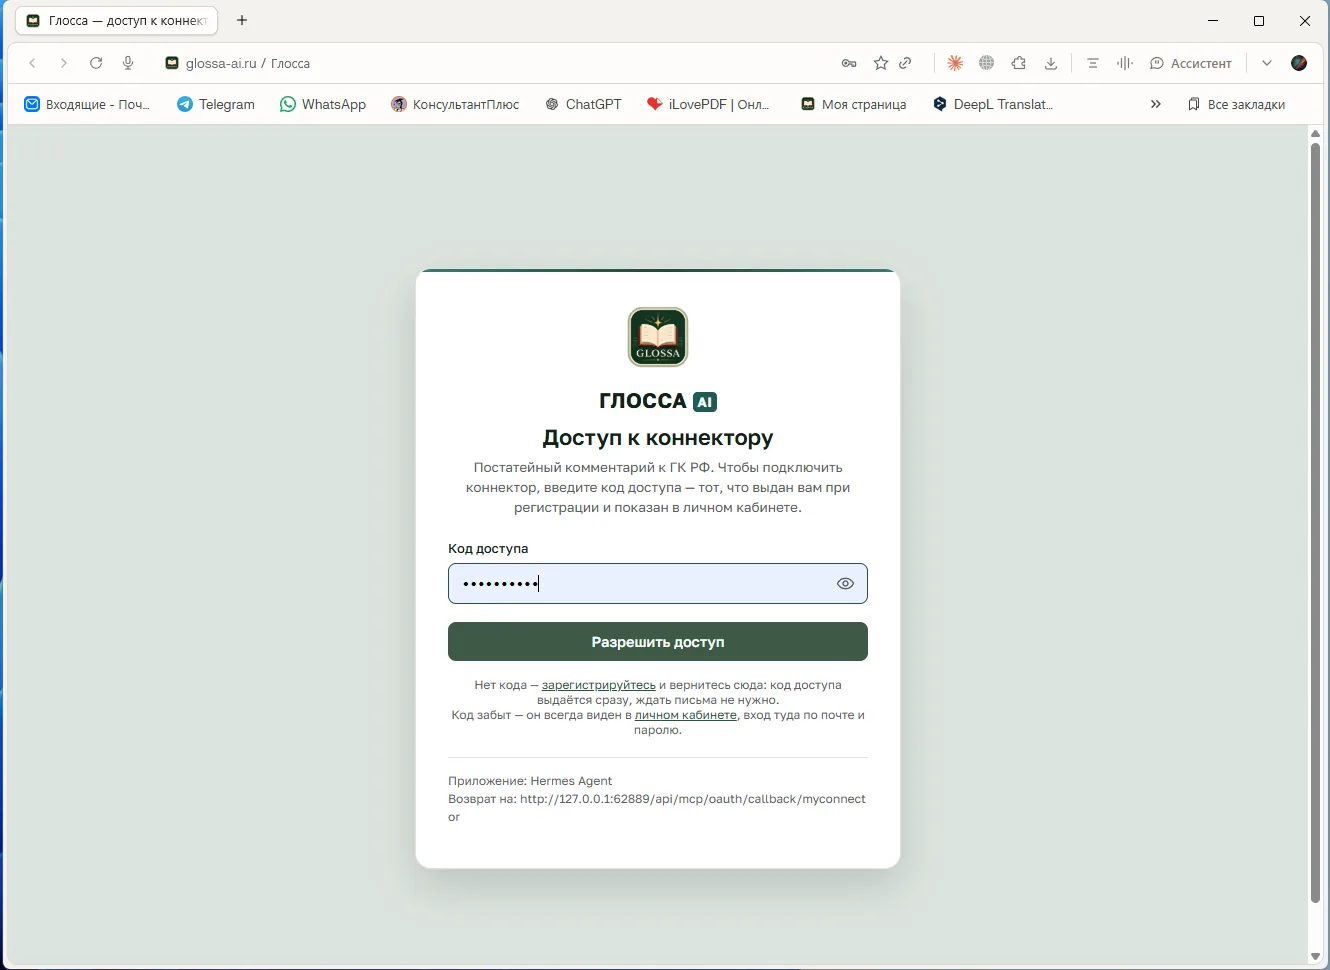
Hermes
The Nous Research agent with any model of your choice. Hermes handles the connection itself: you write one sentence containing the address, and it adds the server, opens the sign-in window, and enables the tools. The conversation takes about ten minutes, with your part taking about one minute.
Installation
If Hermes is already installed, proceed to the connection step. The installer is available on the official Hermes website; from the terminal:
iex (irm https://hermes-agent.nousresearch.com/install.ps1)   # Windows, PowerShell
curl -fsSL https://hermes-agent.nousresearch.com/install.sh | bash   # macOS, Linux, WSL2
Connect with a single command in the chat
Enter the command in a new conversation
Without configuring anything in advance, send a sentence containing the connector address:
The word after “as” becomes the connector’s name in your Hermes. The name can be anything, but must use Latin characters only.
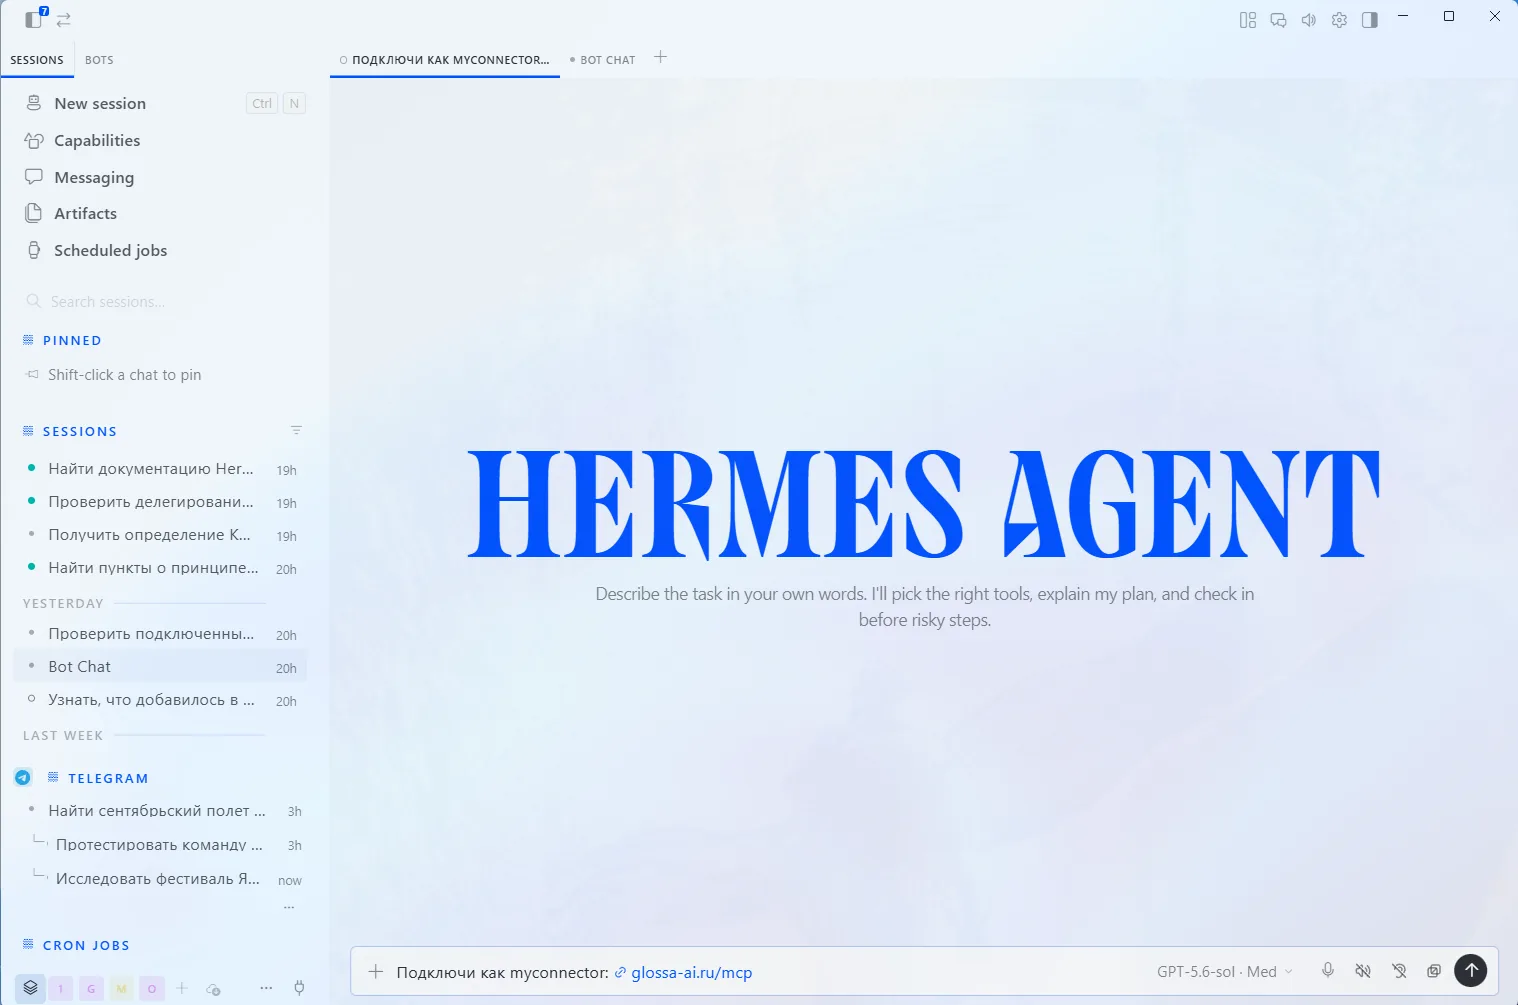
The command entered in the input line of a new conversation. Enable the connector
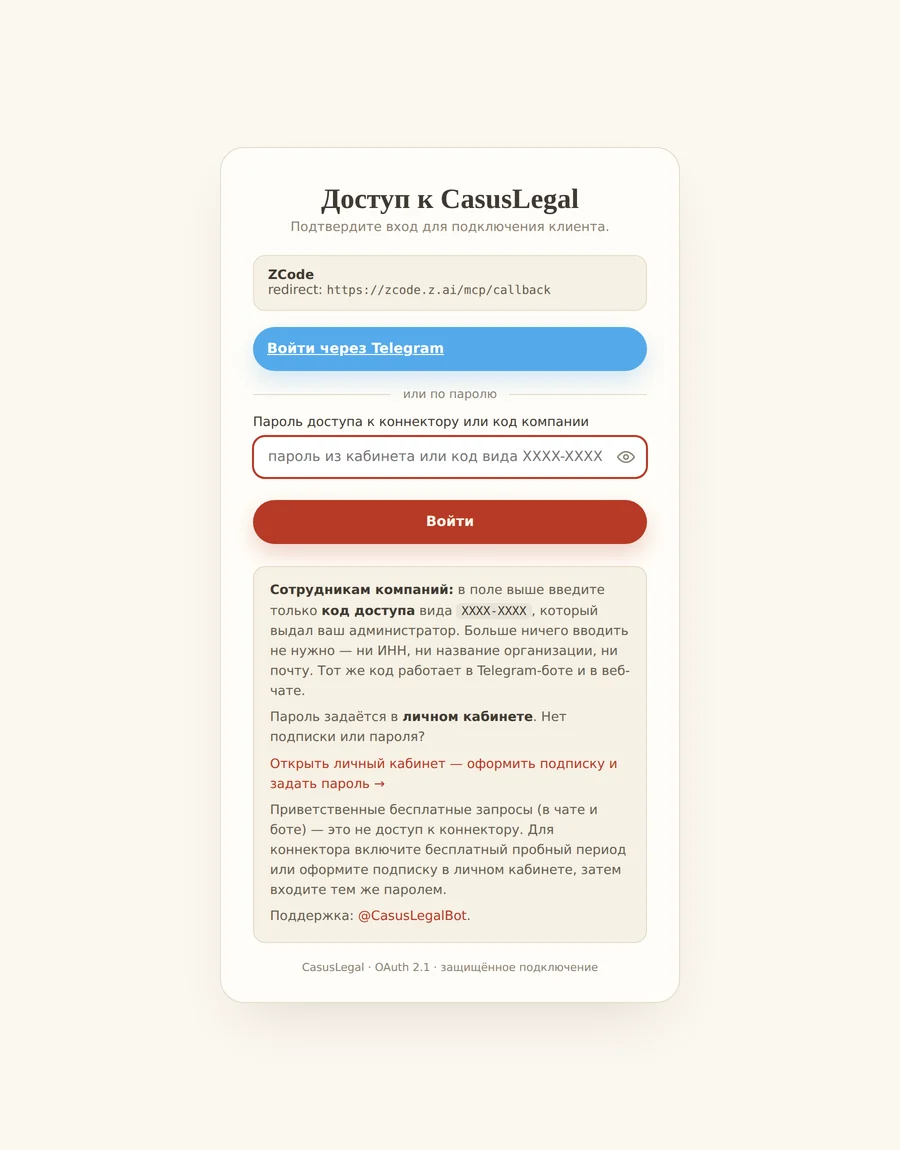
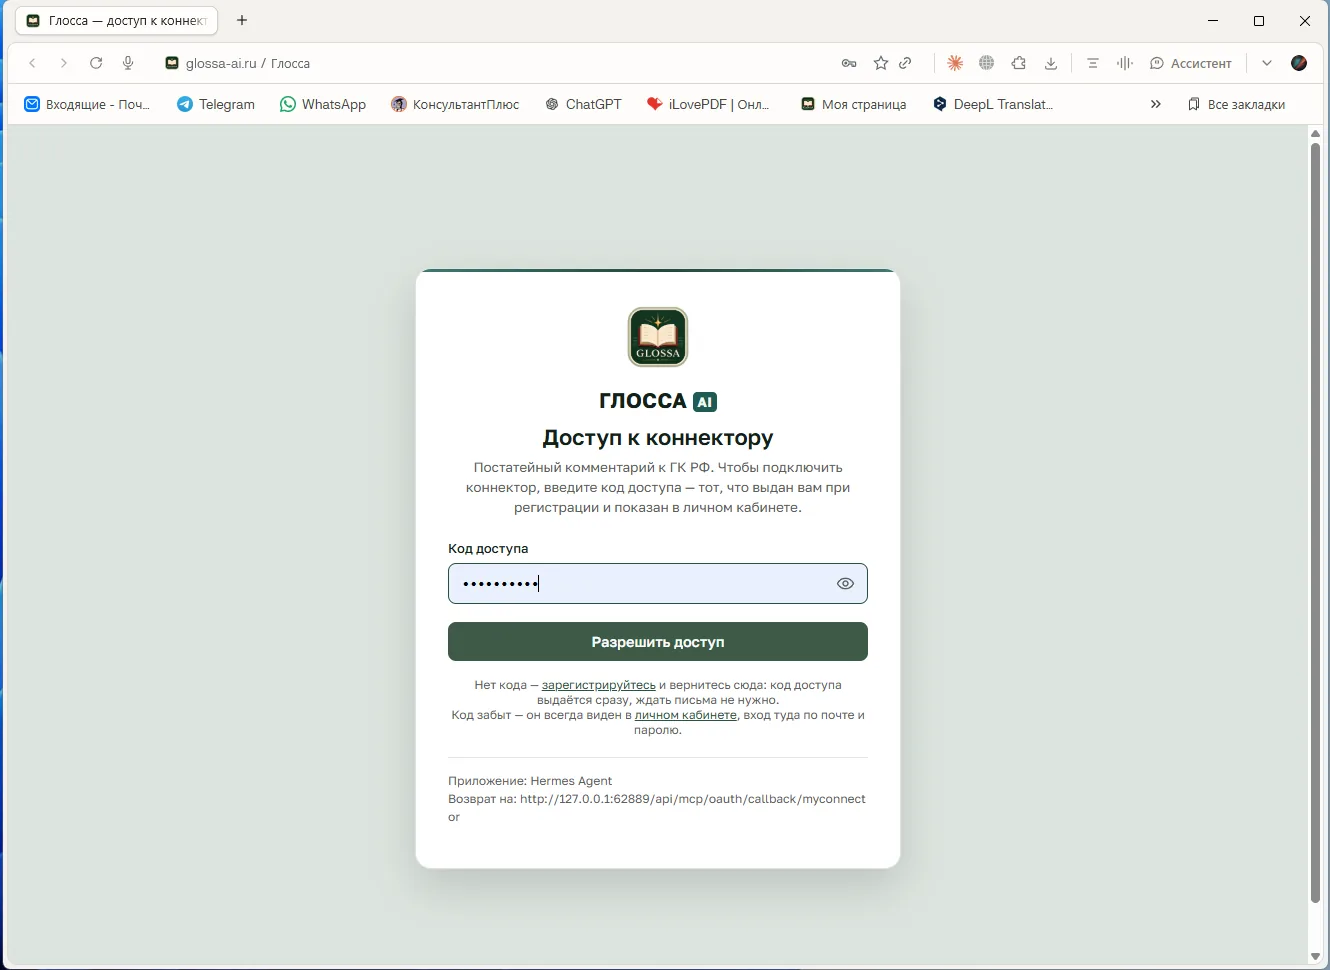
Return to Hermes. It will check the connection (
hermes mcp test) and ask Enable the … MCP server? Click Enable.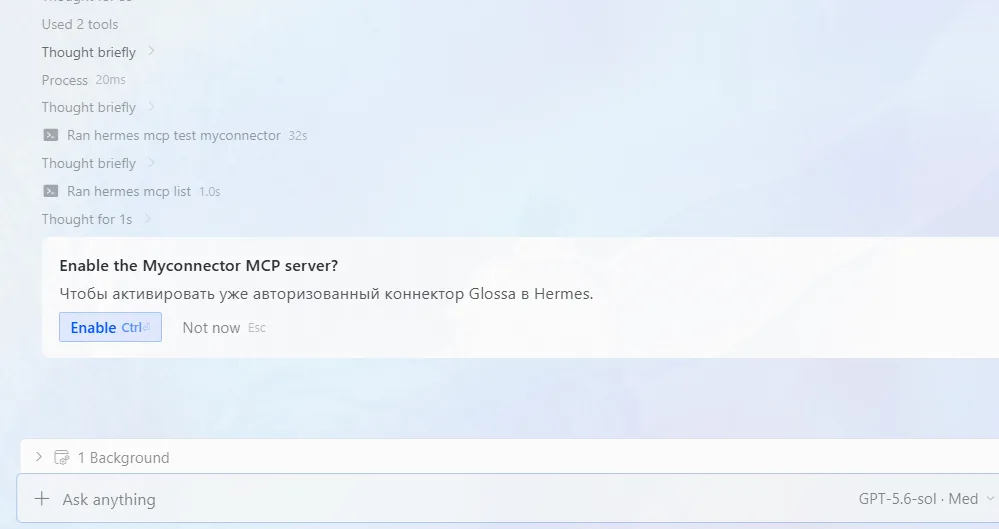
All that remains is to enable the connector that has already been added. Check the report and start a new conversation
At the end, the agent displays the name, address, sign-in method, “enabled” status, and number of tools found. The tools appear in new conversations: open a new one or run
/reload-mcp.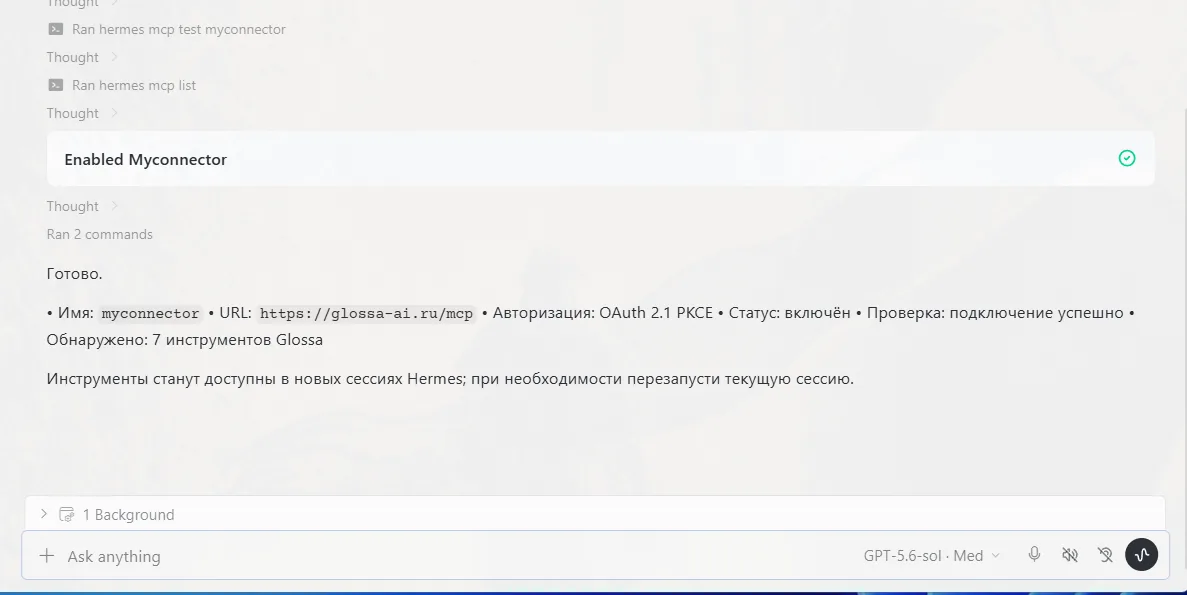
Agent report: connector enabled.
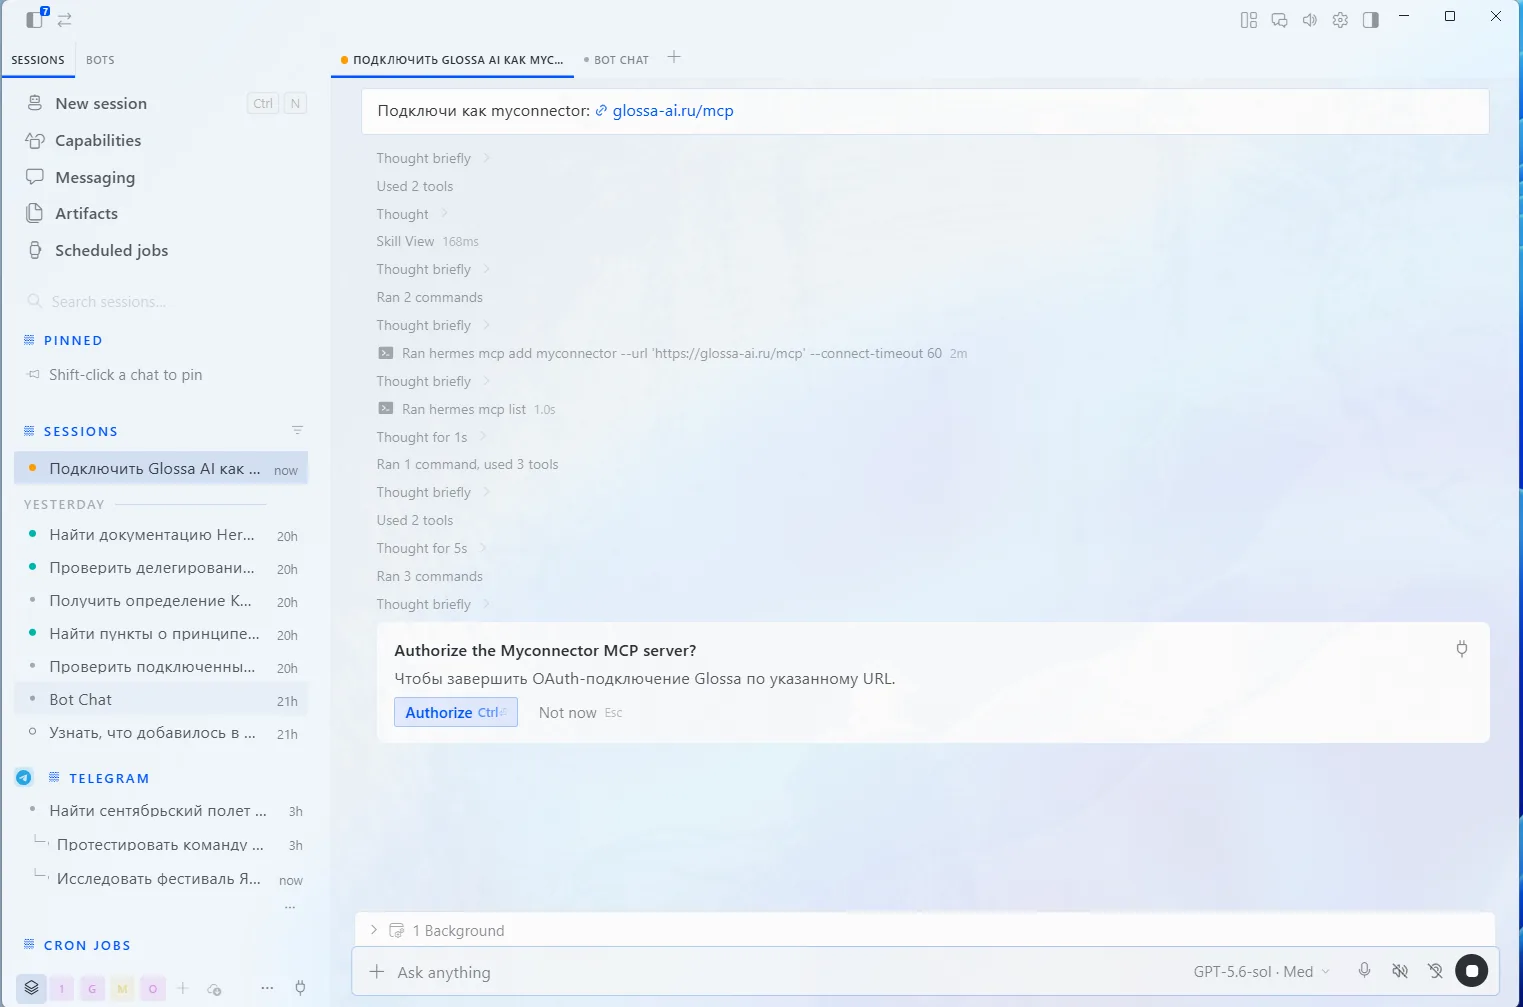
If you want to do it manually
In the app. Skills → MCP tab → New Server. If there are no other servers, paste the entire text; if there are, add the block inside mcpServers separated by commas. Click Save and turn on the toggle; when the status is Needs authentication click Authenticate.
In the terminal.
ZCode
Unsupported environment: it works according to the MCP standard, but we do not guarantee the stability of a particular version.
Open the list of MCP servers
Settings → MCP Servers → New MCP Server. Scope: User, so that the connector works in all projects.
Fill in the form
Type: HTTP (not stdio or SSE). URL: . Name: .
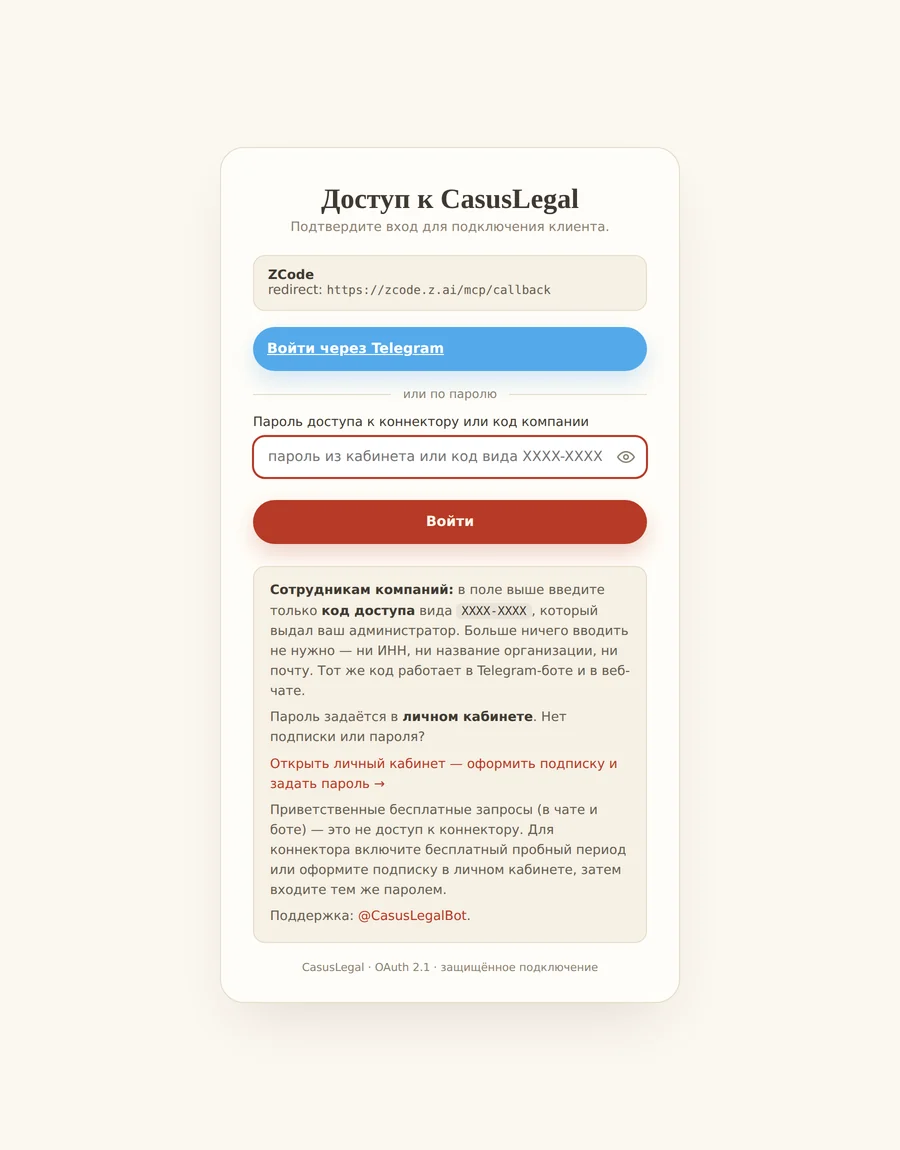
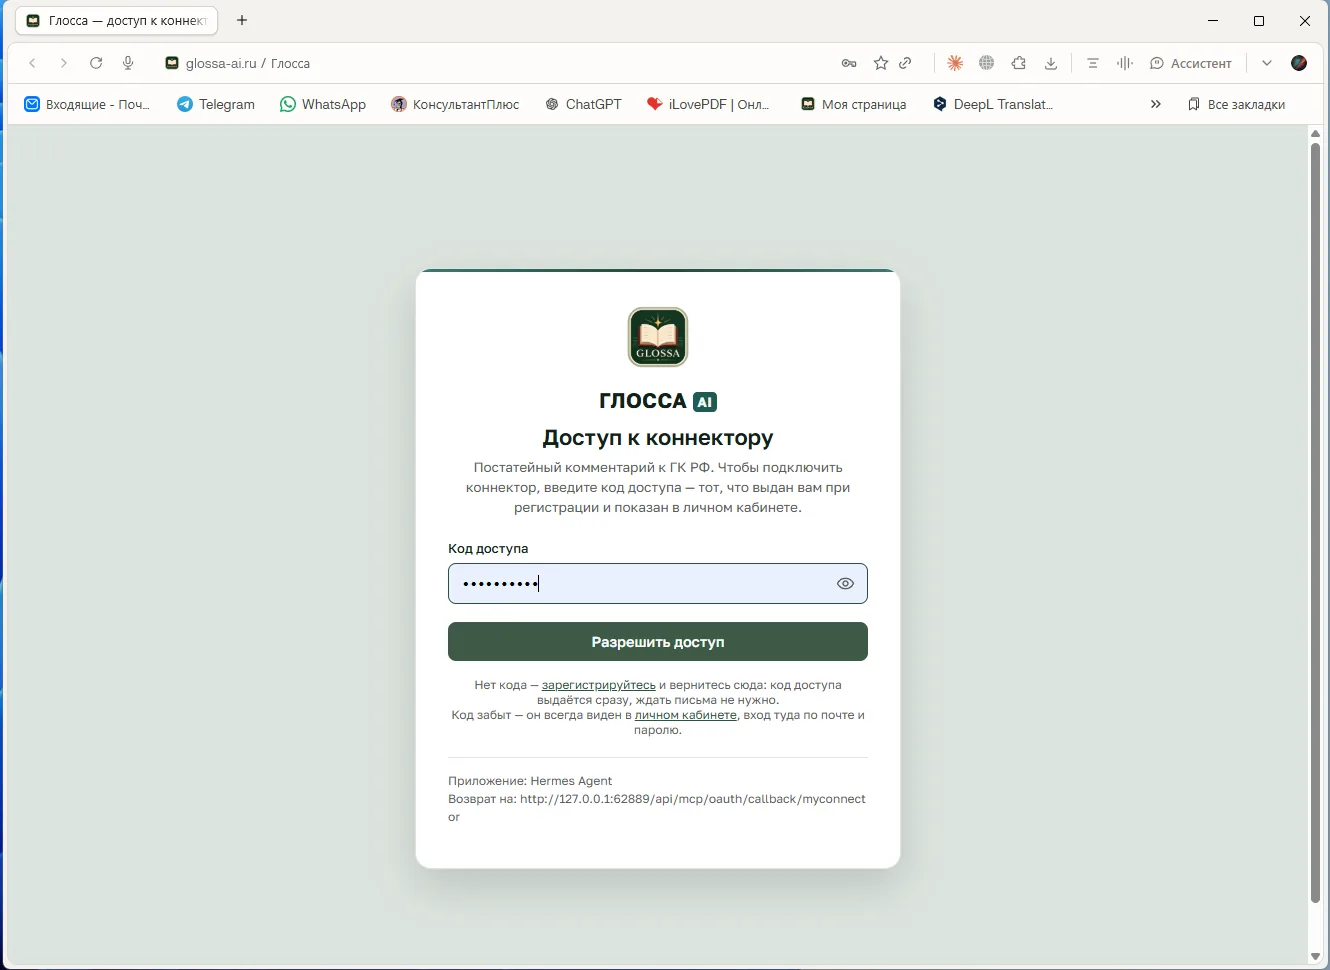
Fill in Name, Type, and URL. Do not touch Headers. Test the connection
Ask: “» The first search takes about 30 seconds.
AnythingLLM
Unsupported environment. There is no sign-in window here: access is passed in a header.
Open Agent Skills → MCP Servers
Settings gear → Agent Skills; at the bottom, the MCP Servers section with a Refresh button.
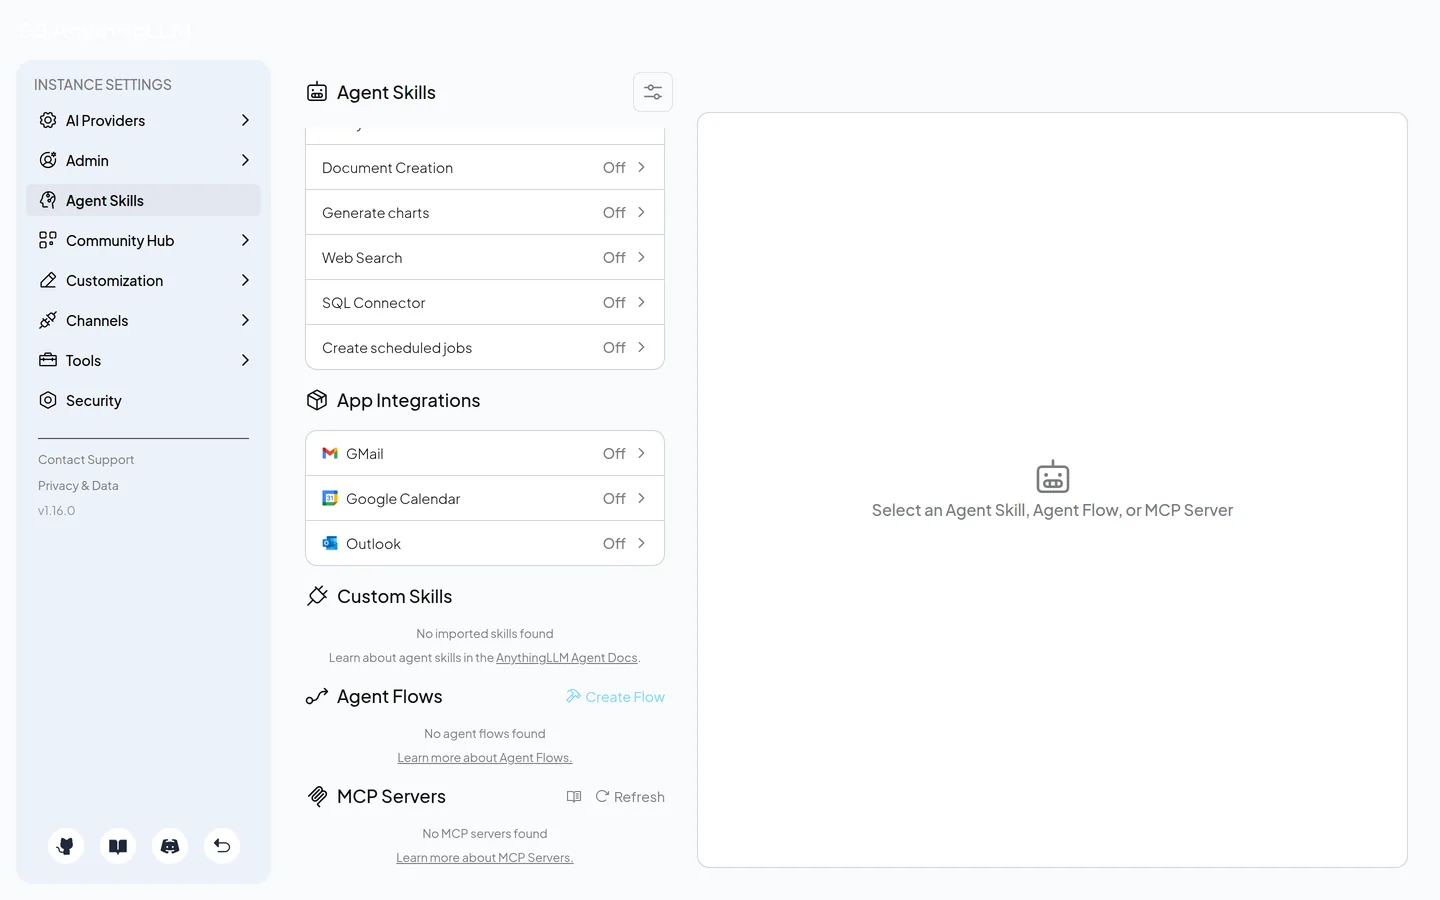
Describe the server in a file
File
storage/plugins/anythingllm_mcp_servers.json. Type is requiredstreamable, withssethe connection will not be established.Click Refresh
The Running status means that the connection has been established. Stopped: invalid key or sse type.
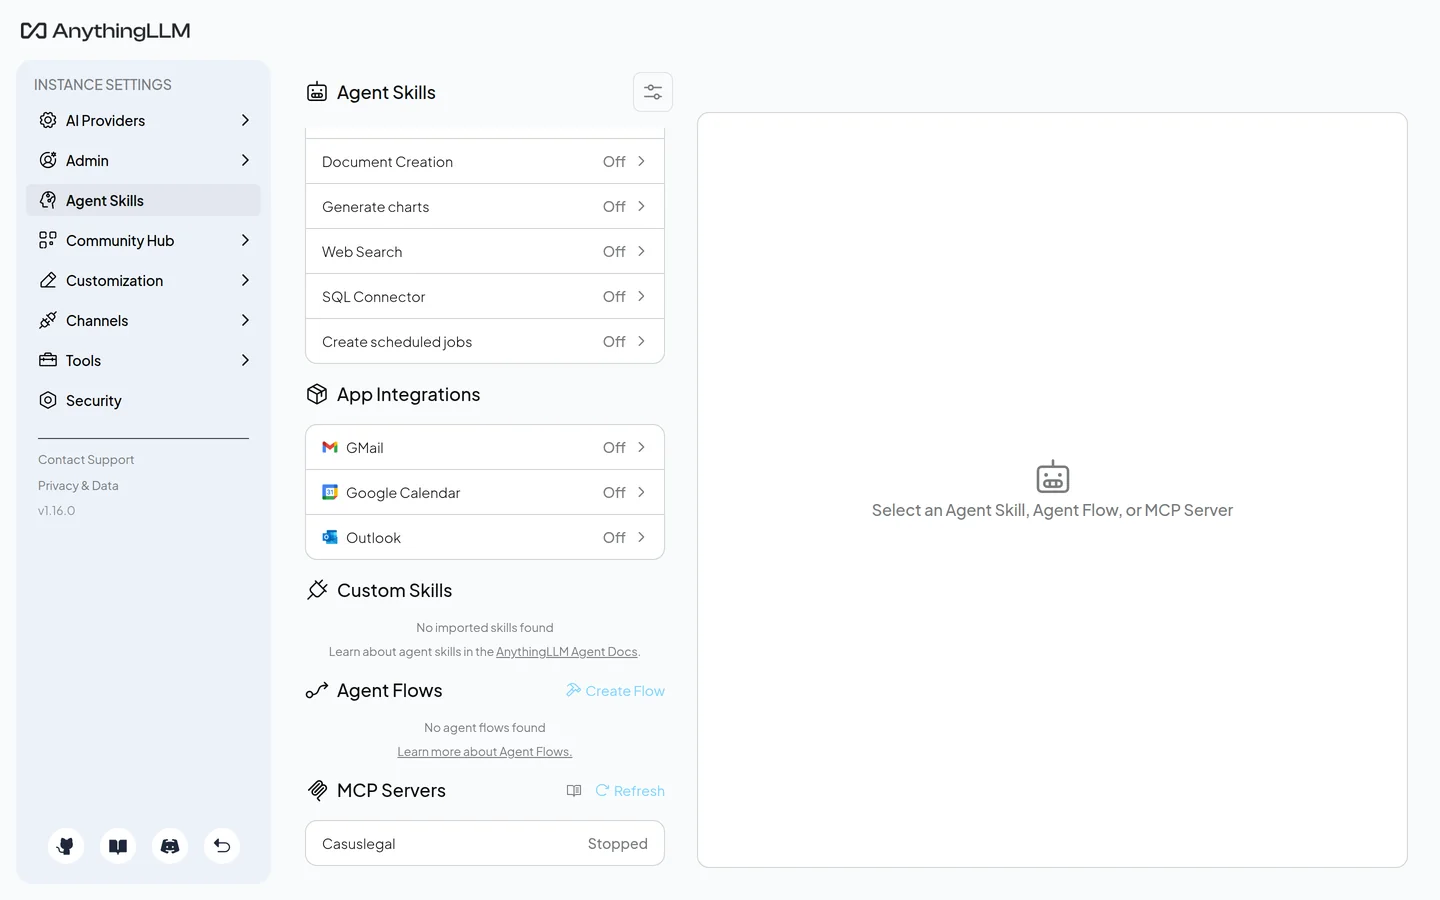
Ask via @agent
The tools work only in agent mode: start the message with
@agent.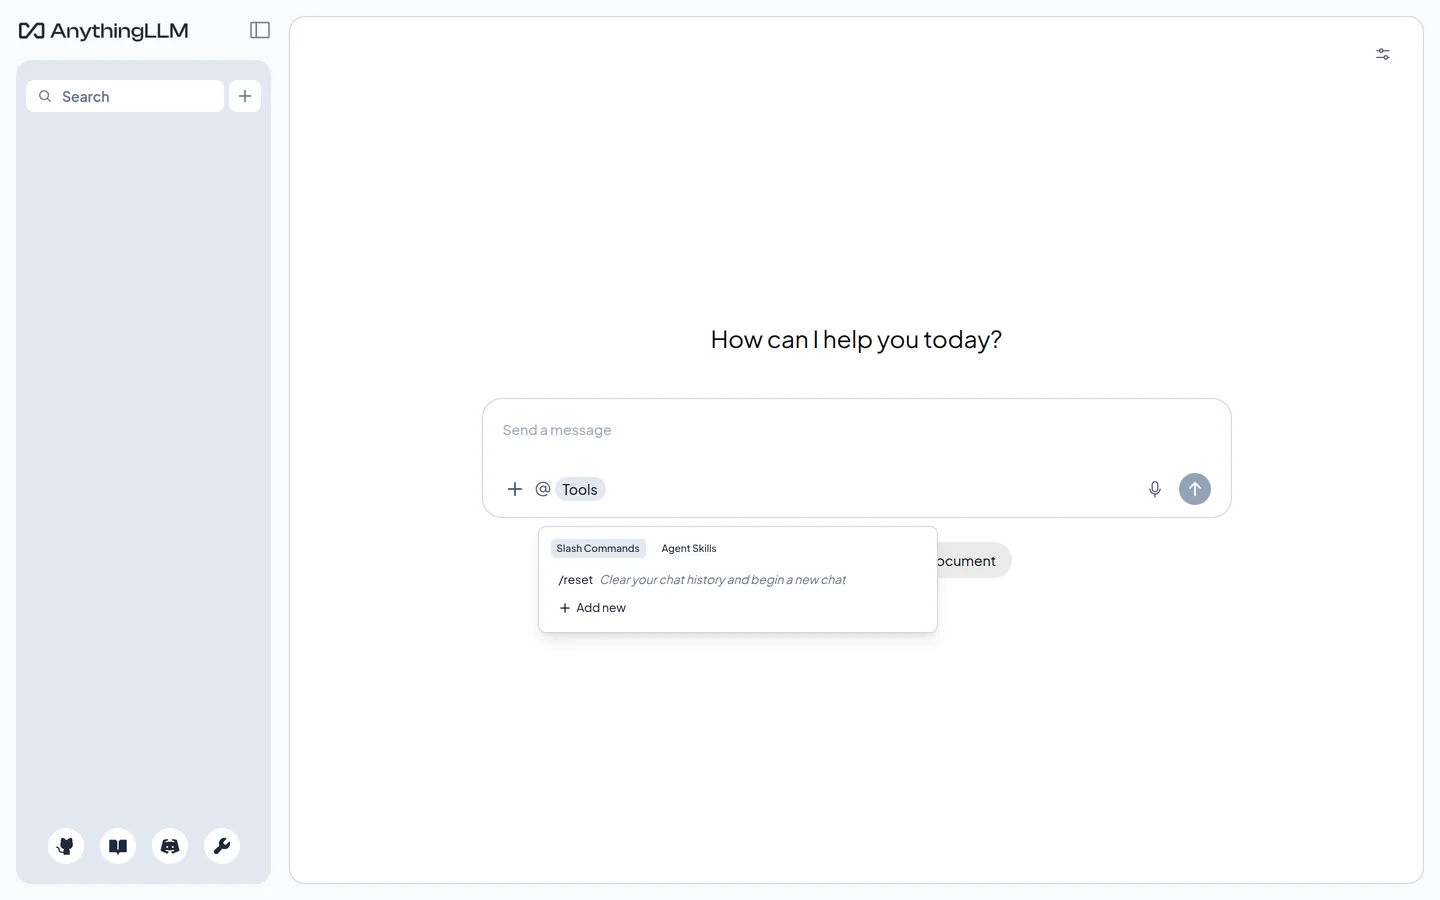
DeepSeek Harness
Unsupported environment, for use in the terminal. There is no sign-in window: access is passed in a header.
Add the server to cordis.patch.yml
File
~/.dsh/profiles/web/cordis.patch.yml. The entry must useinsert, otherwise dsh will silently skip it.Check the configuration
dsh --profile web --dump-config | tail -20
Run dsh web
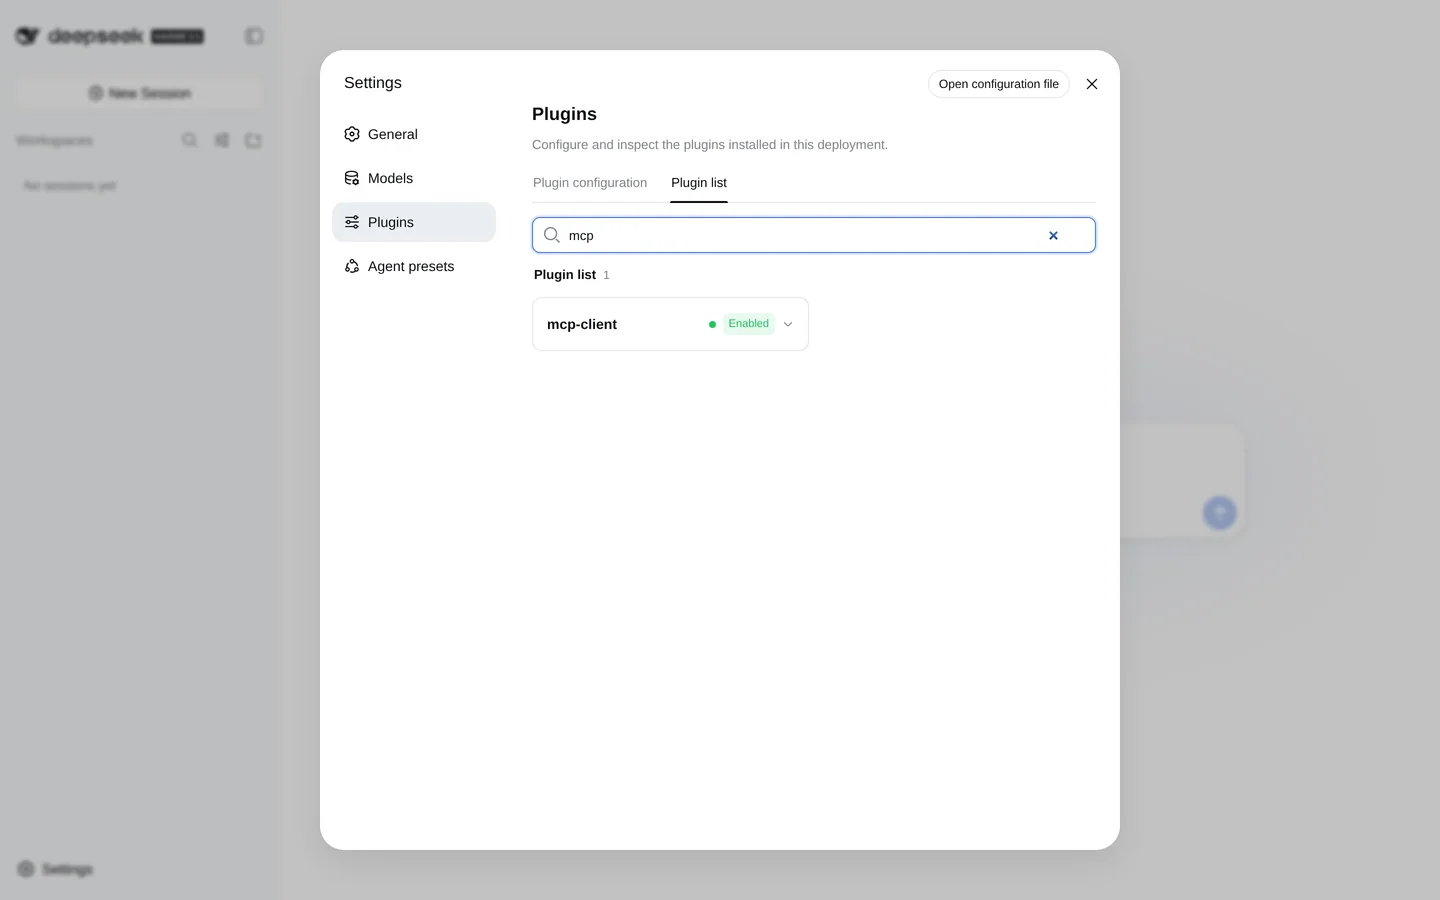
Settings → Plugins → Plugin list; search for mcp: the mcp-client entry must be Enabled.
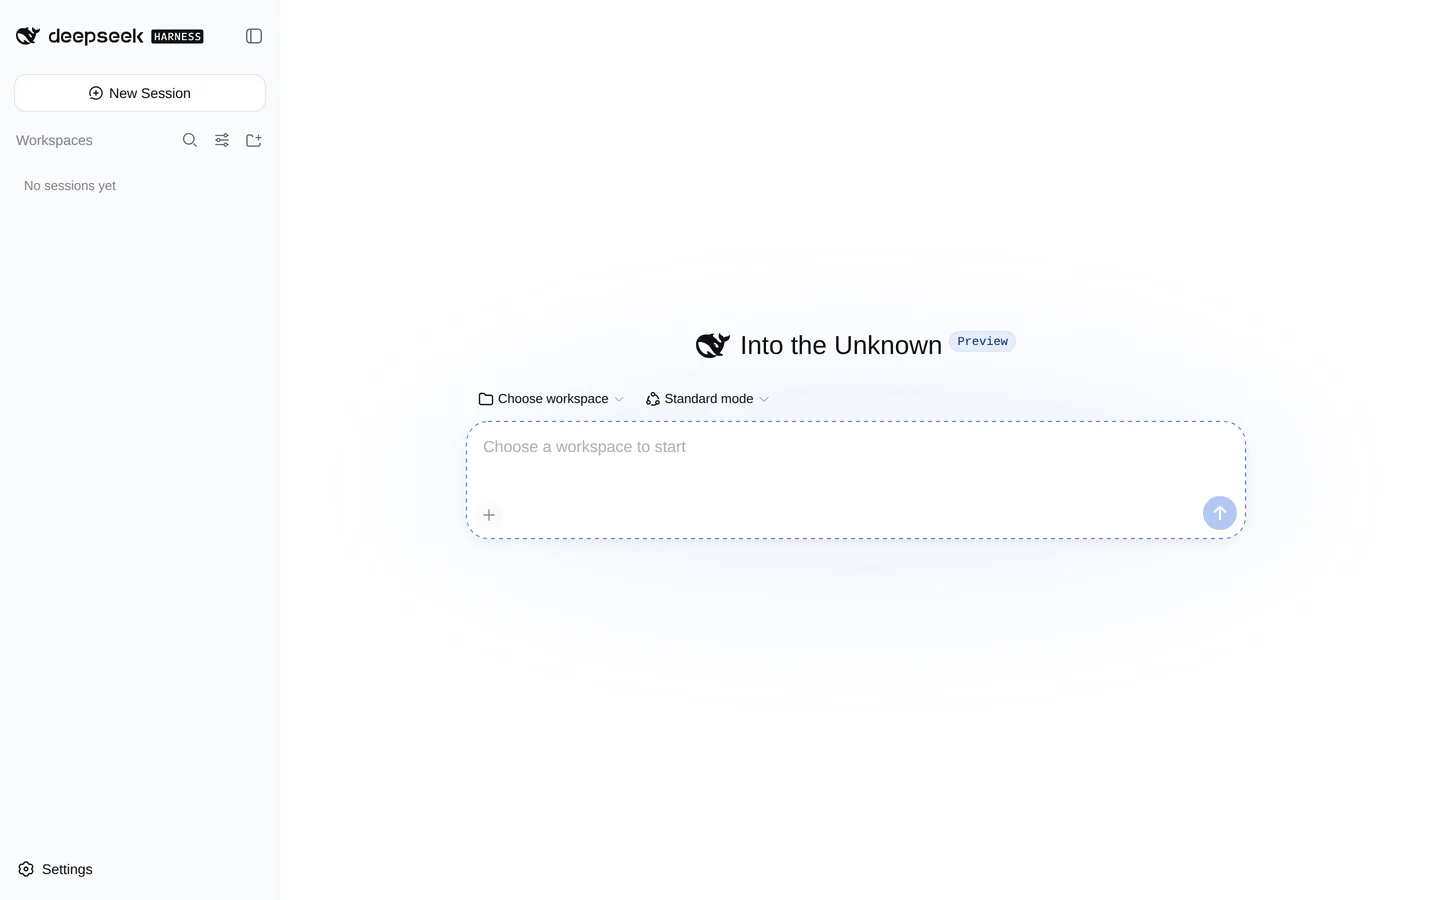
If something is wrong
The connector connected successfully but is not used in the chat
Check the name: it must use Latin characters. The AI cannot see the tools if the name is in Russian. Disable the connector and connect it again.
Sign-in succeeded, but the connector responds with a denial
Check the address: the field must contain the address of the selected connector, not the one shown in the screenshot. Then check access in your account dashboard, under “Access.”
Authorization fails
The advanced OAuth settings (Client ID, Secret) must be empty. Do not enter a login, phone number, or password there.
The tools appear twice
Both the unified CasusLegal address and the former separate database addresses are connected. Keep only the unified address.